
Let me guess. Somewhere, in a safe place, you keep a box that holds the lone portrait of your grandparents’ mid-twentieth-century nuptials. In an envelope tucked securely inside an old photo album hides your father’s Navy photo. You have an external disk drive filled with hundreds of images of flora and fauna from the tropical vacation you took a few years ago and your iPhone is jammed with pictures of your kids building snowmen this past winter.
I thought so. Photo overload happens to all of us—including my clients in 2012, Jen and Flip, a gorgeous couple with a young family living in Westchester, New York. So, in the spirit of almost-spring, here’s some inspiration to help end the buried-photo stress today with a fantastic solution: the gallery wall!
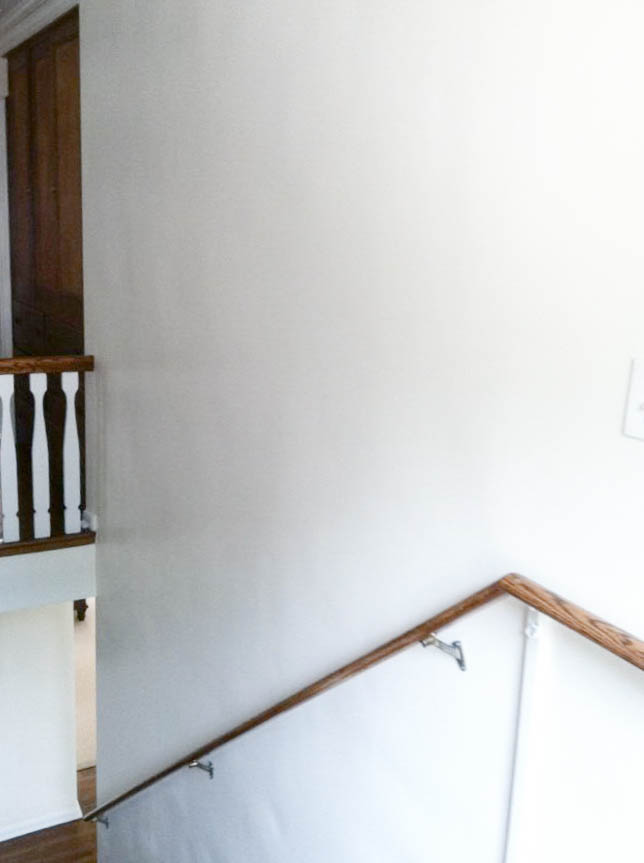
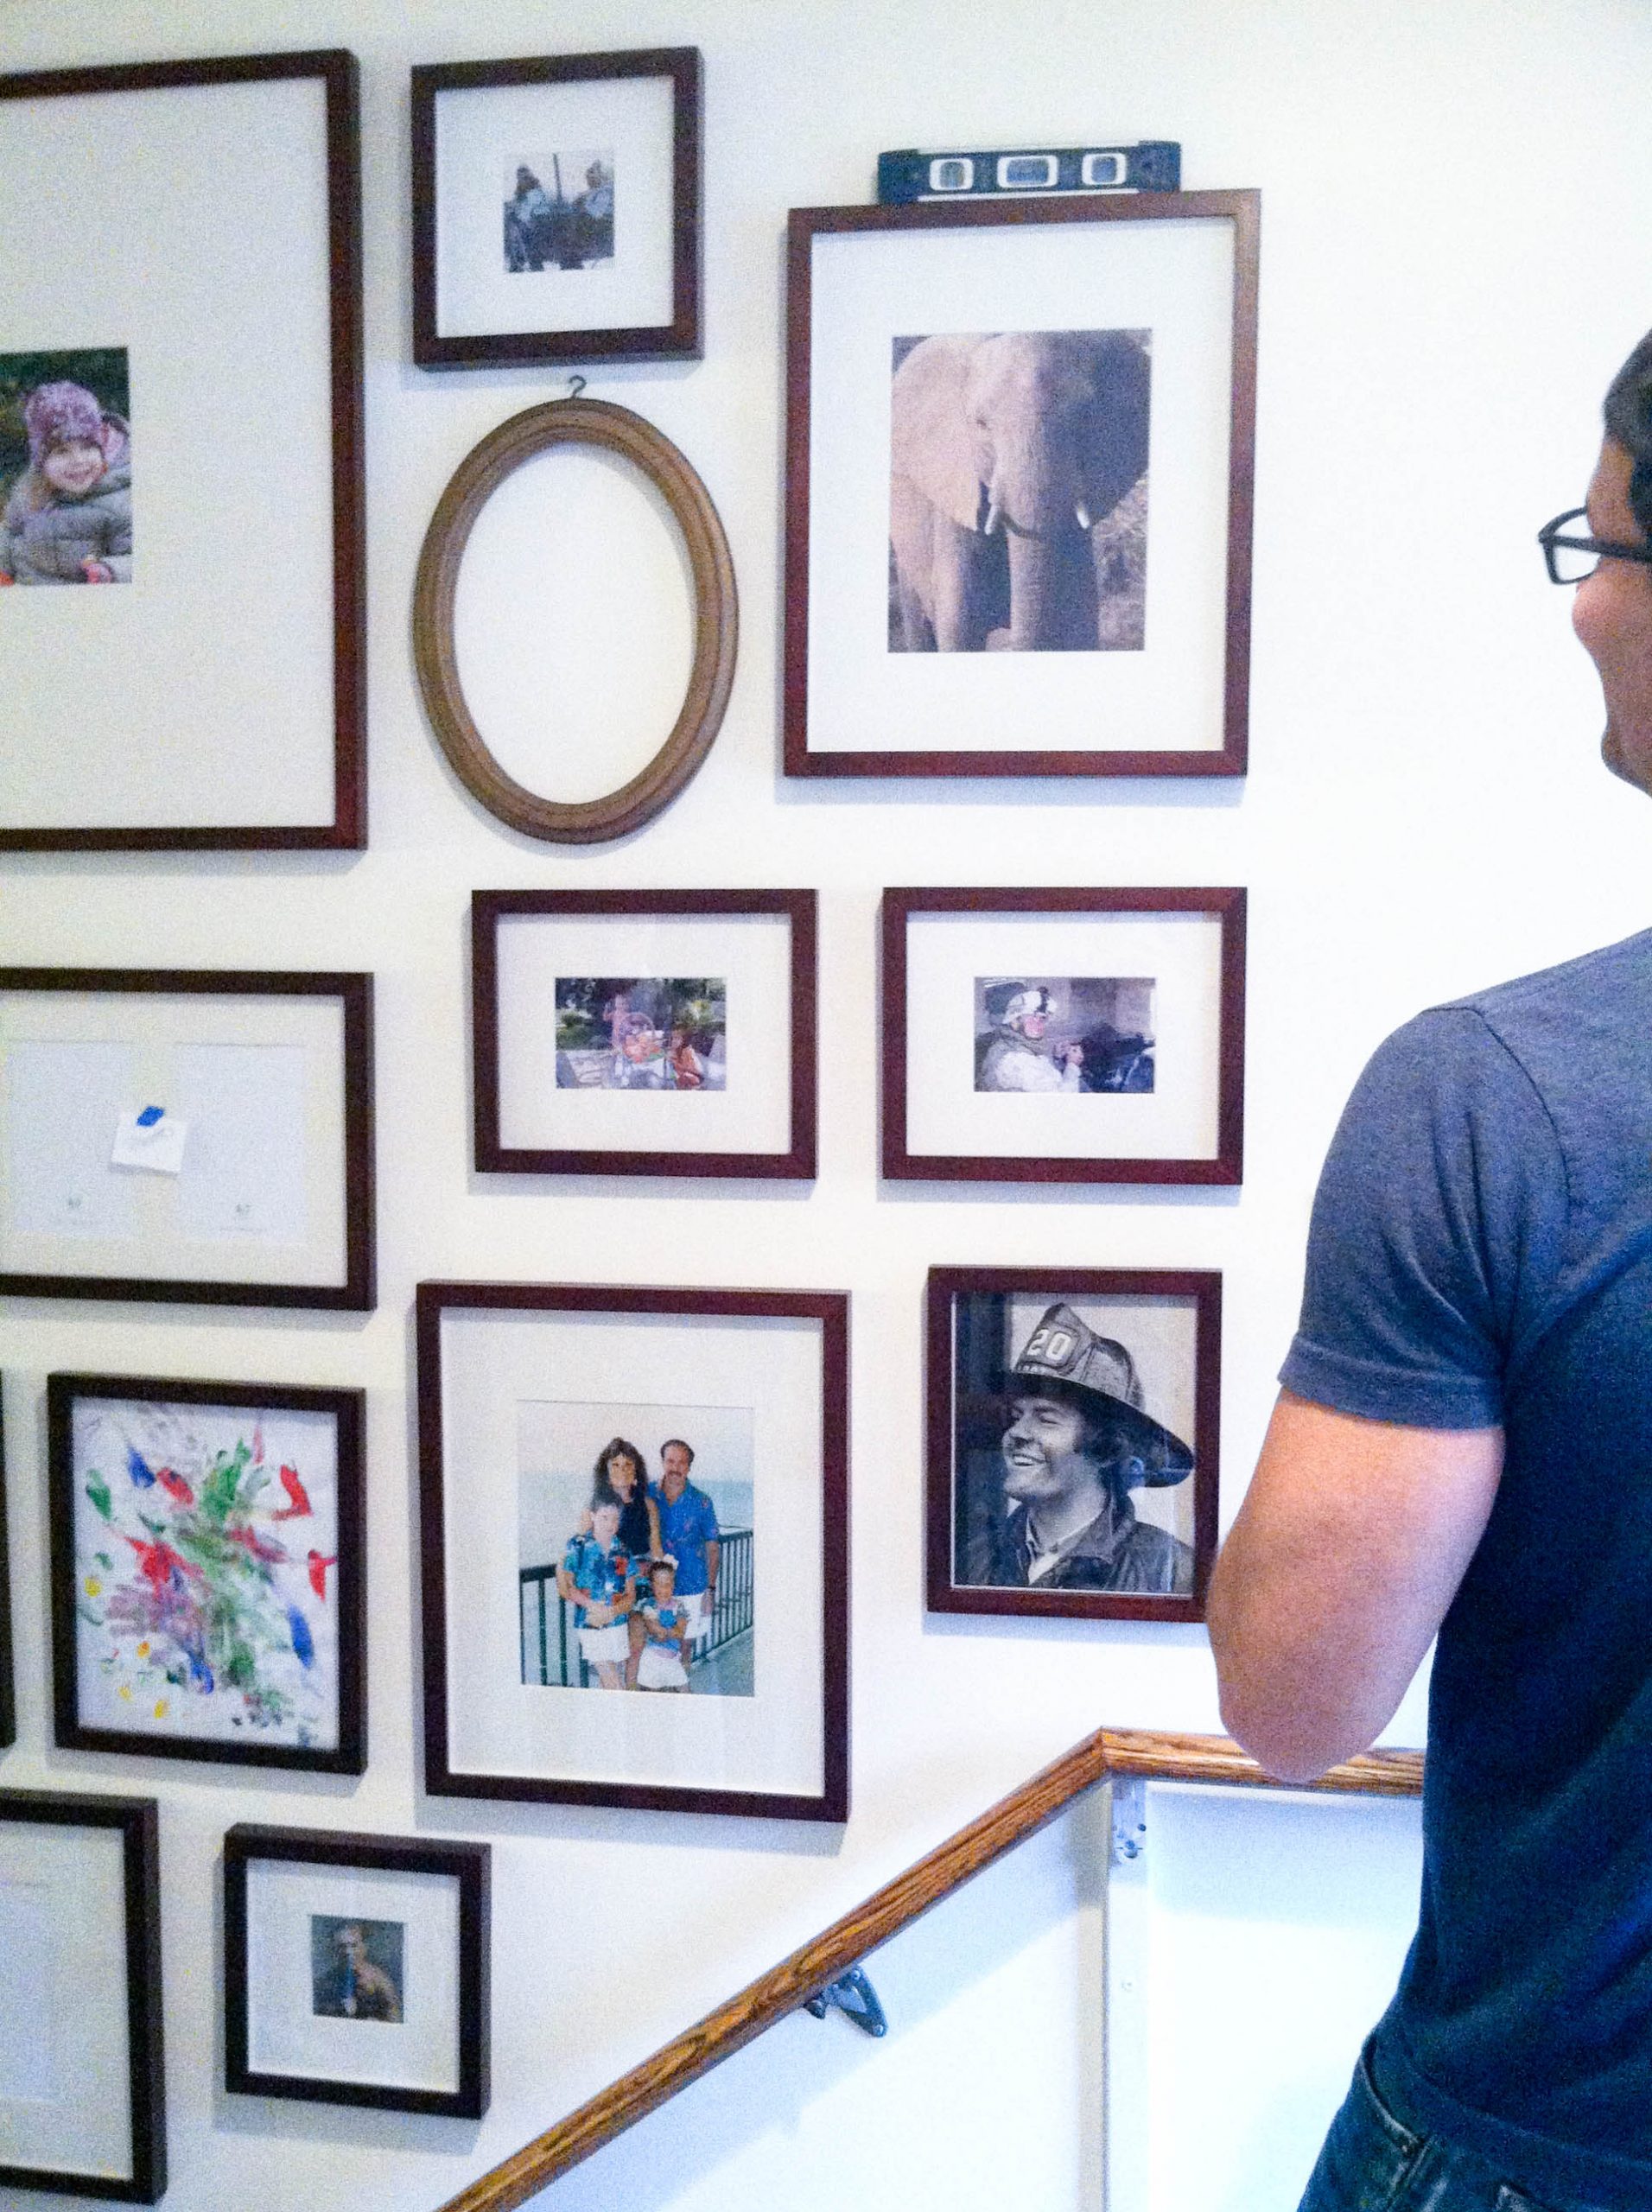
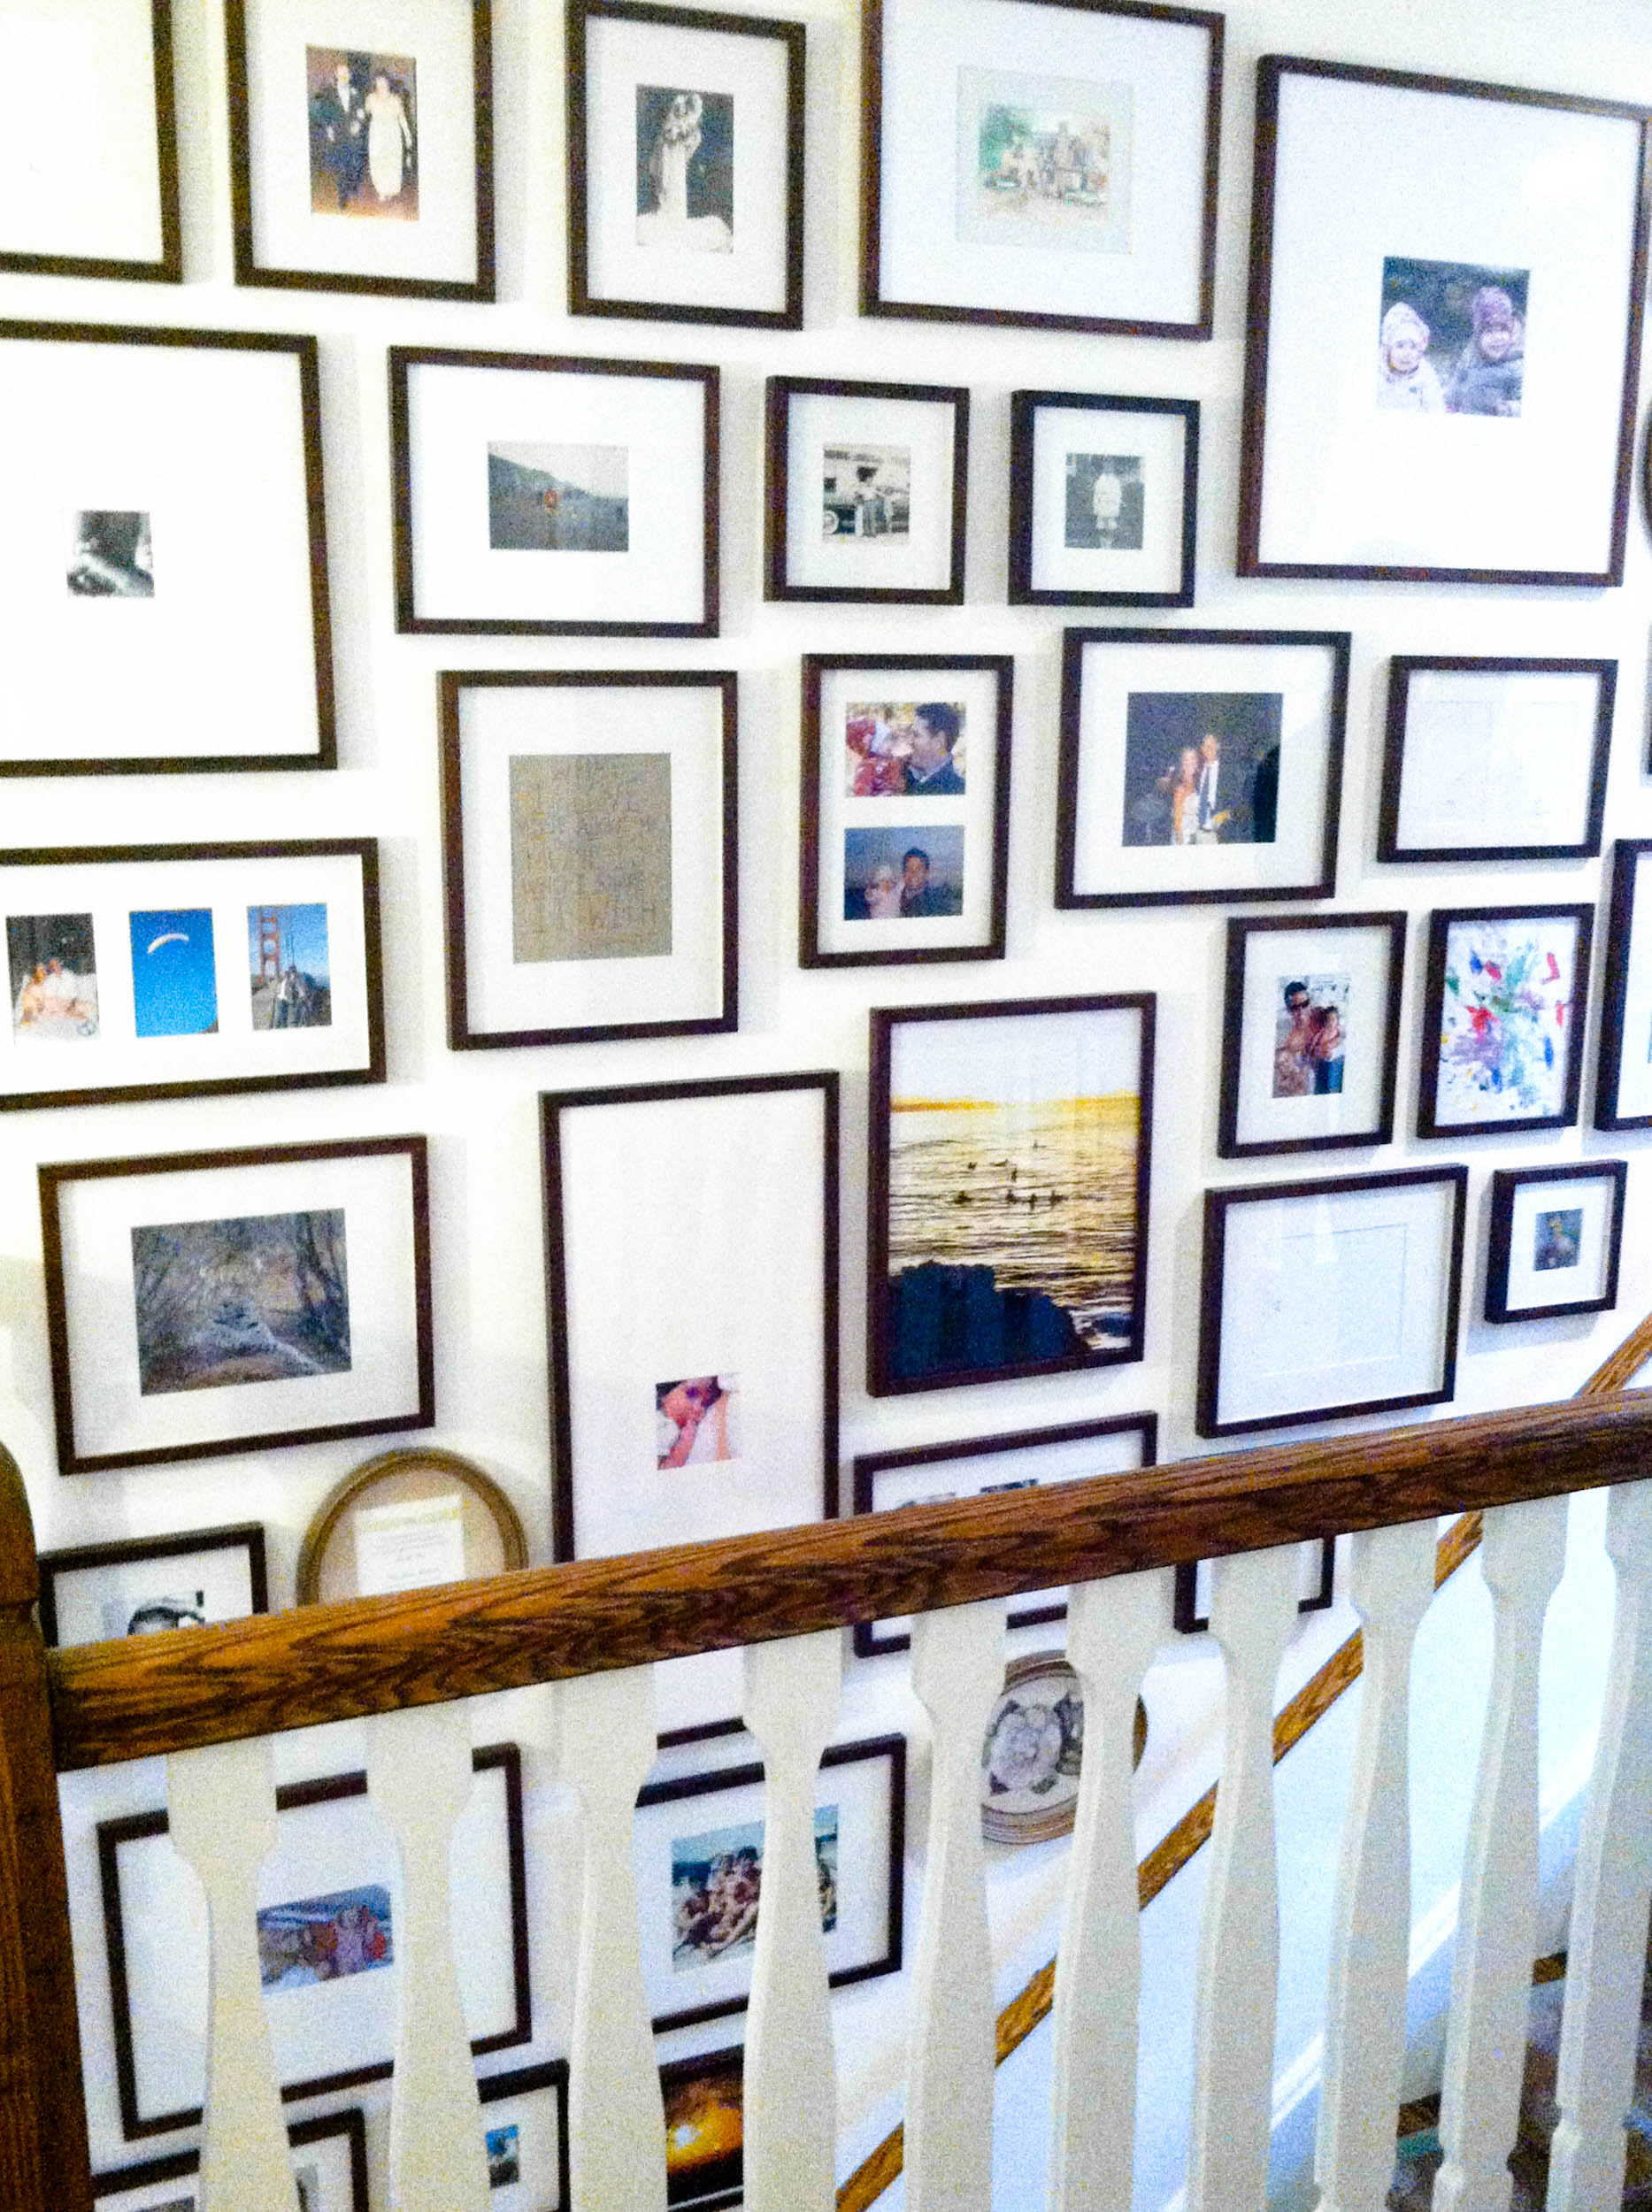
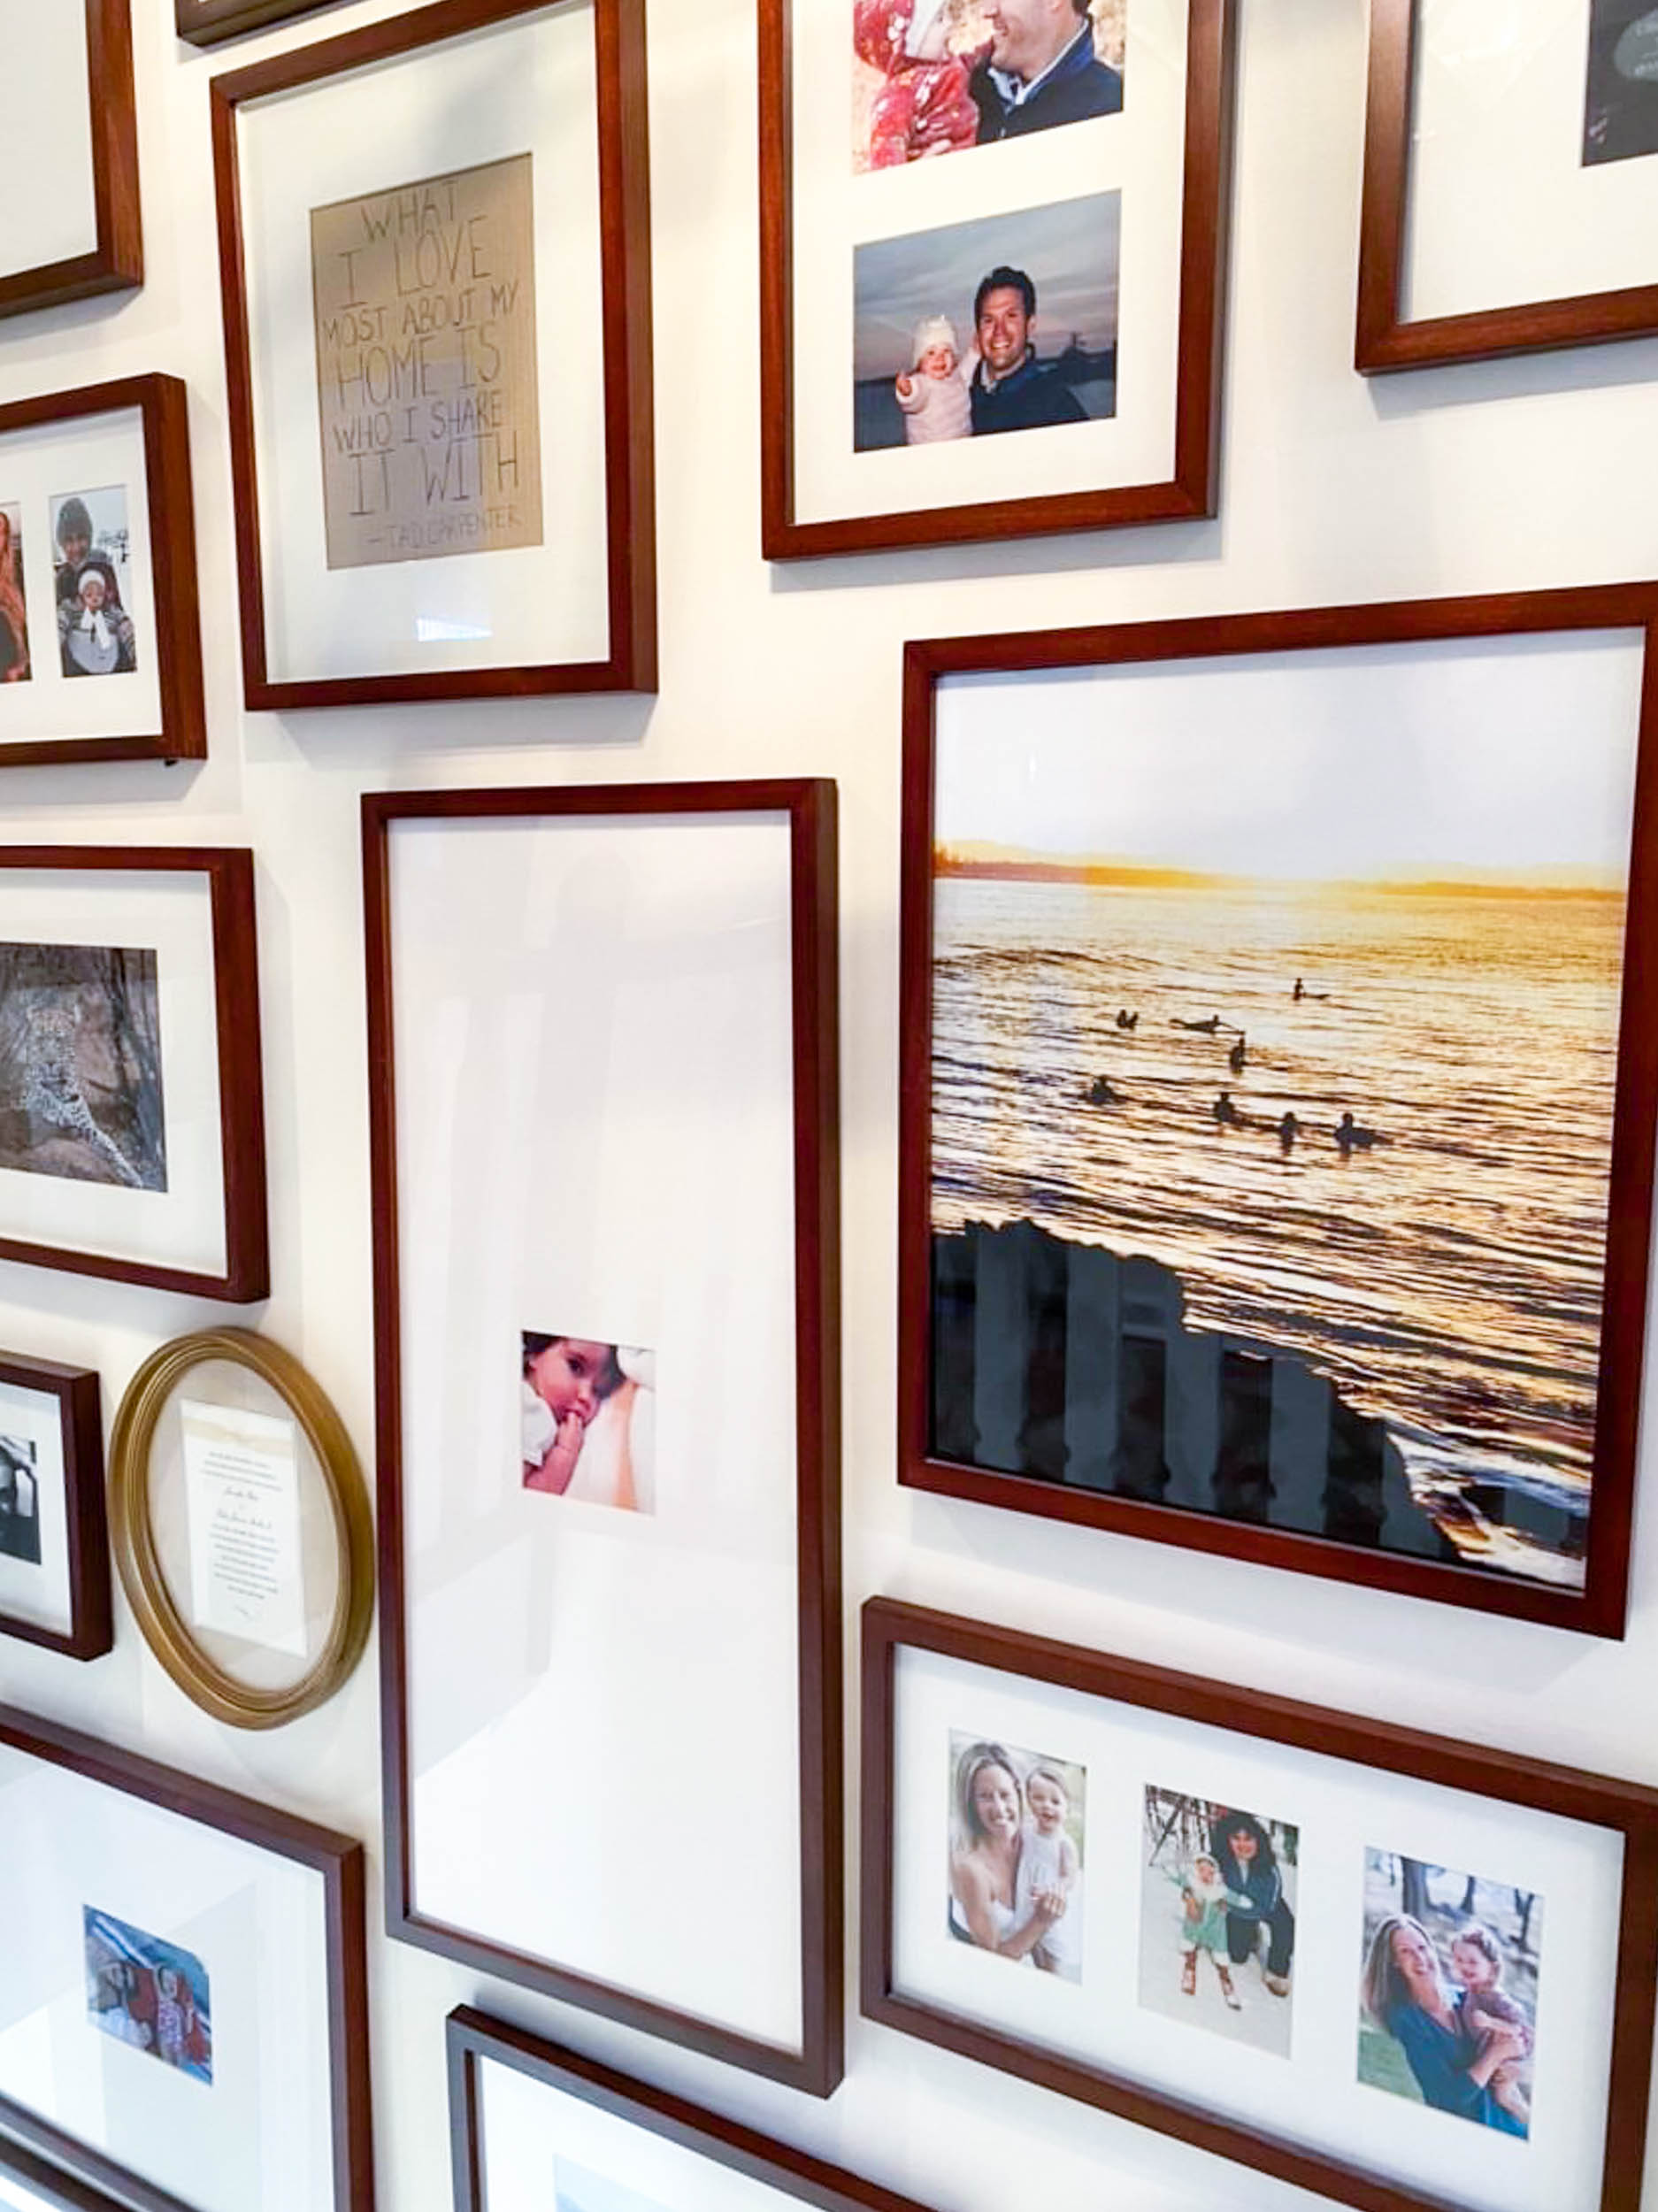
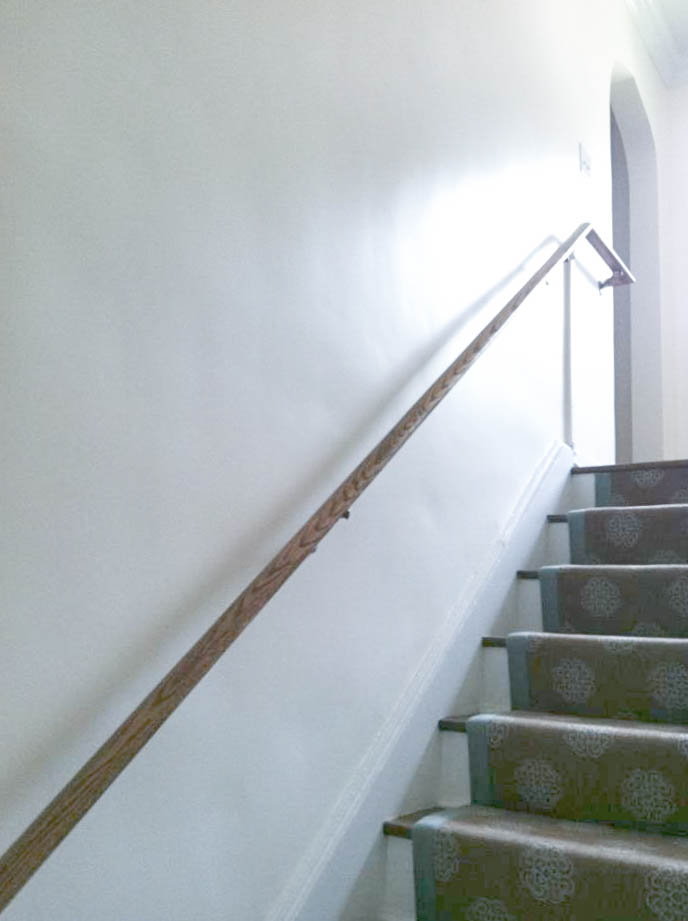 My first visit to their house made it clear that this project was going to be amazing. Jen led me to the 12′ x 12′ stairwell where she wanted to create the gallery and showed me her inspiration photo—an oversized print of her husband sitting on a surfboard in Byron Bay under the Australian sunset. What a fabulous place to start! I could tell from her furnishings that she had a great eye, and while she wanted to keep this passageway clean and traditional, her innate sense of fun and adventure opened the door to marvelous possibility.
Initially, Jen had a vision of about ten framed images nicely arranged toward the bottom of the stairs. That idea was all well and good, but after an hour of sharing stories, and learning that she and her husband came from large families and owned tons of old photos, along with amazing shots from once-in-a-lifetime trips (not to mention two of the sweetest little girls who were so photogenic), all I could think was “go big, or go home.” If ever a space was meant for more, it was this one!
 Sienna and Peyton. The sisters. Seriously.
The Plan.
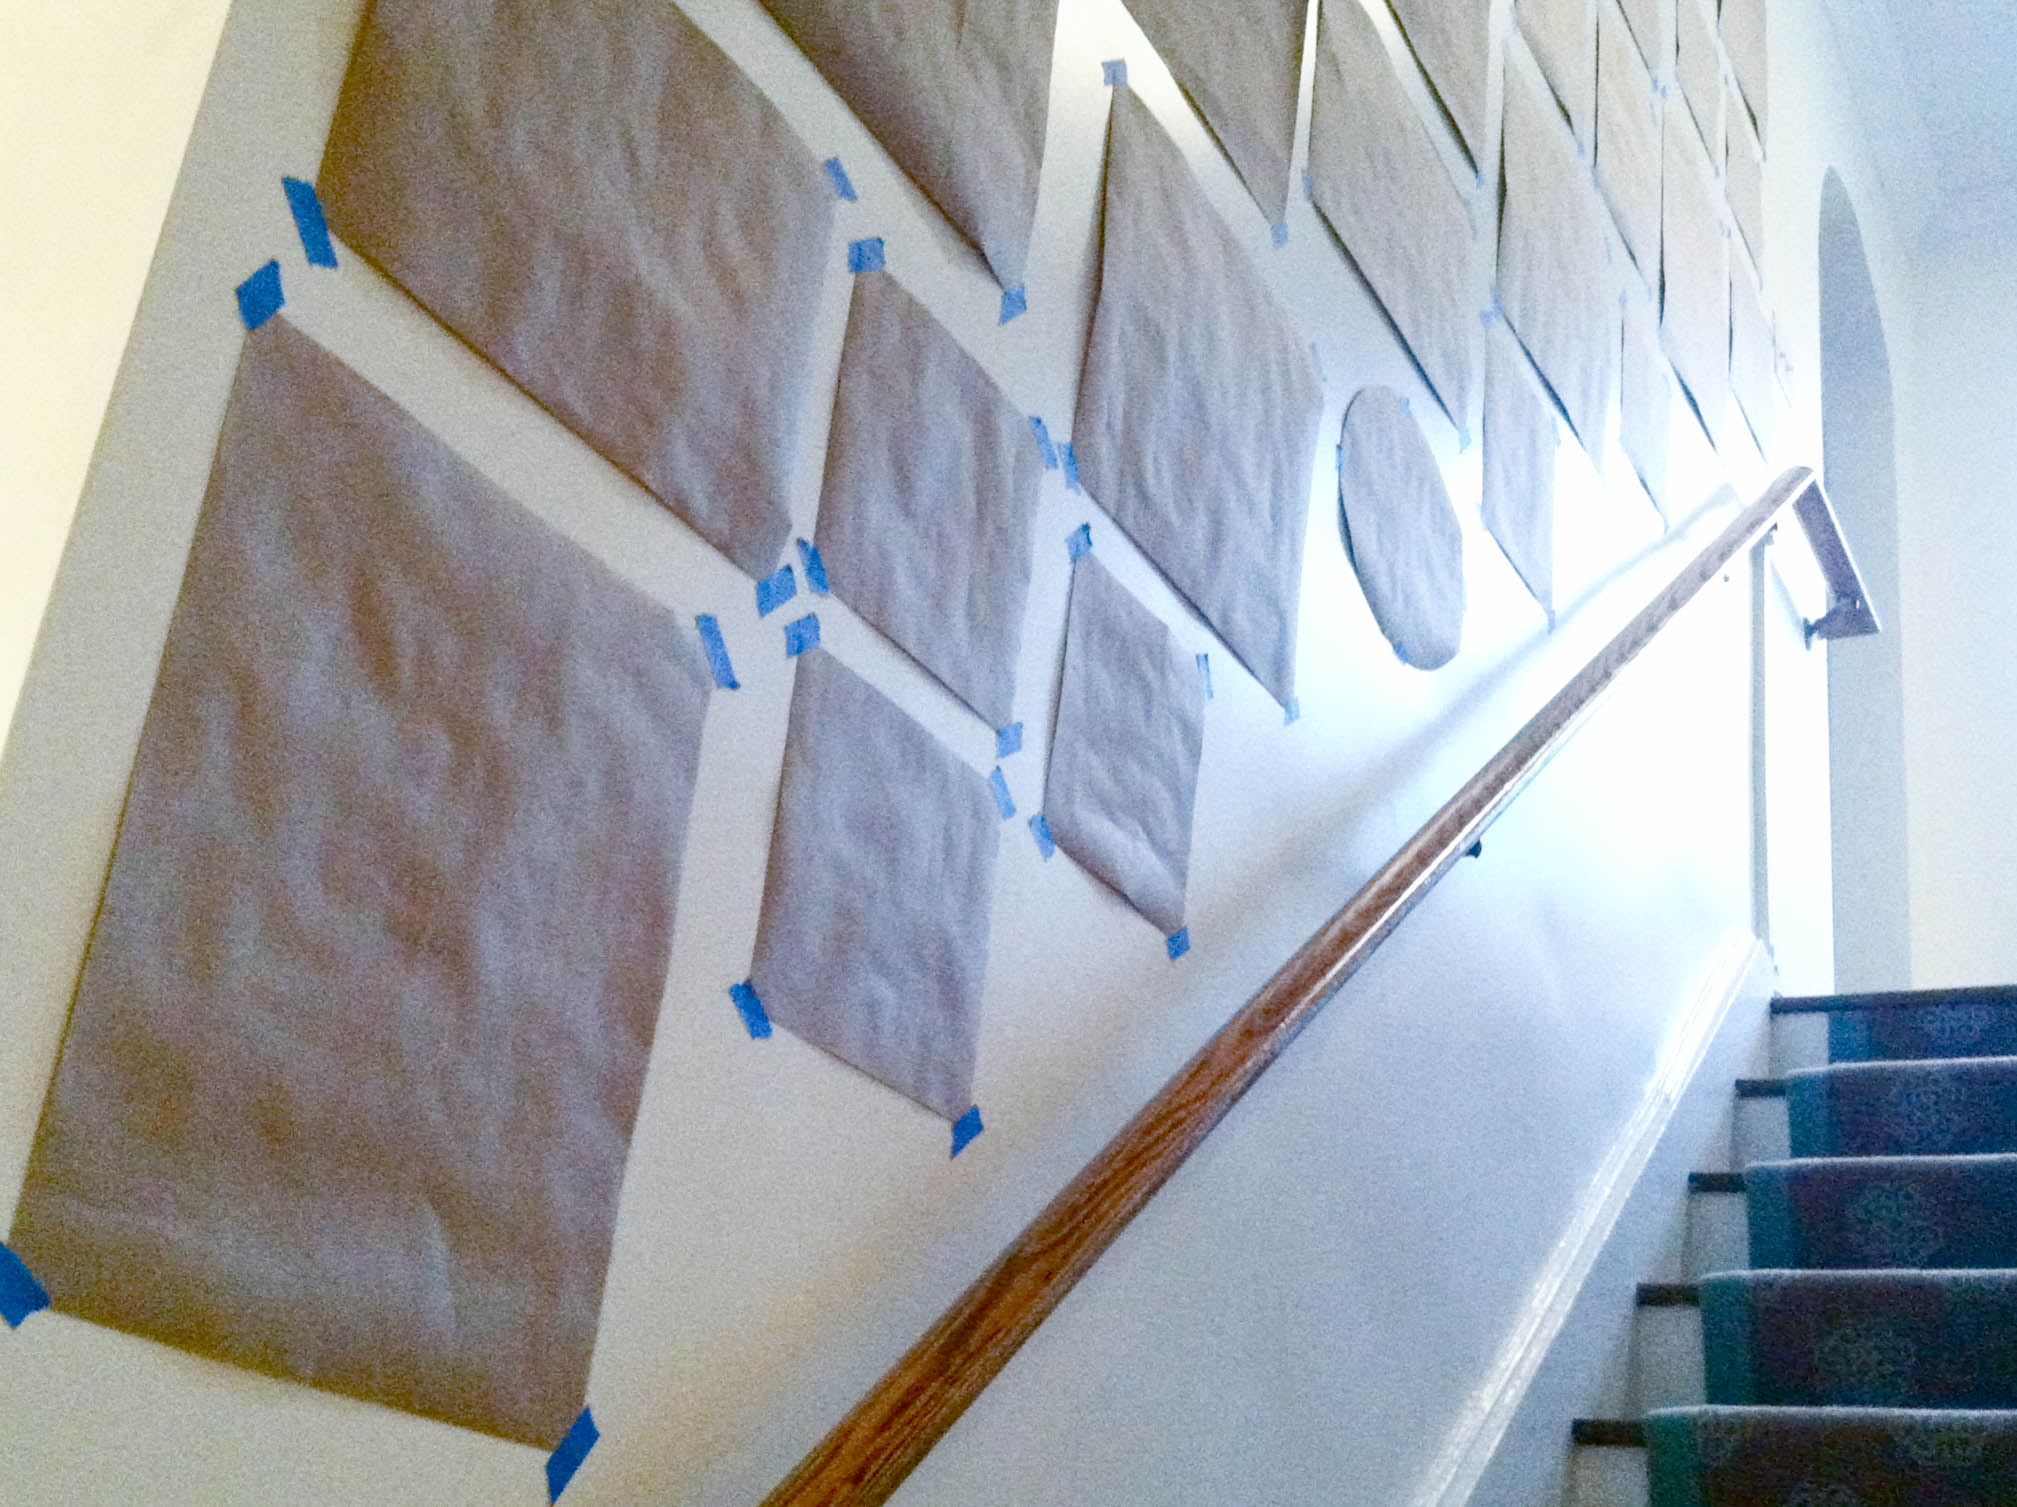
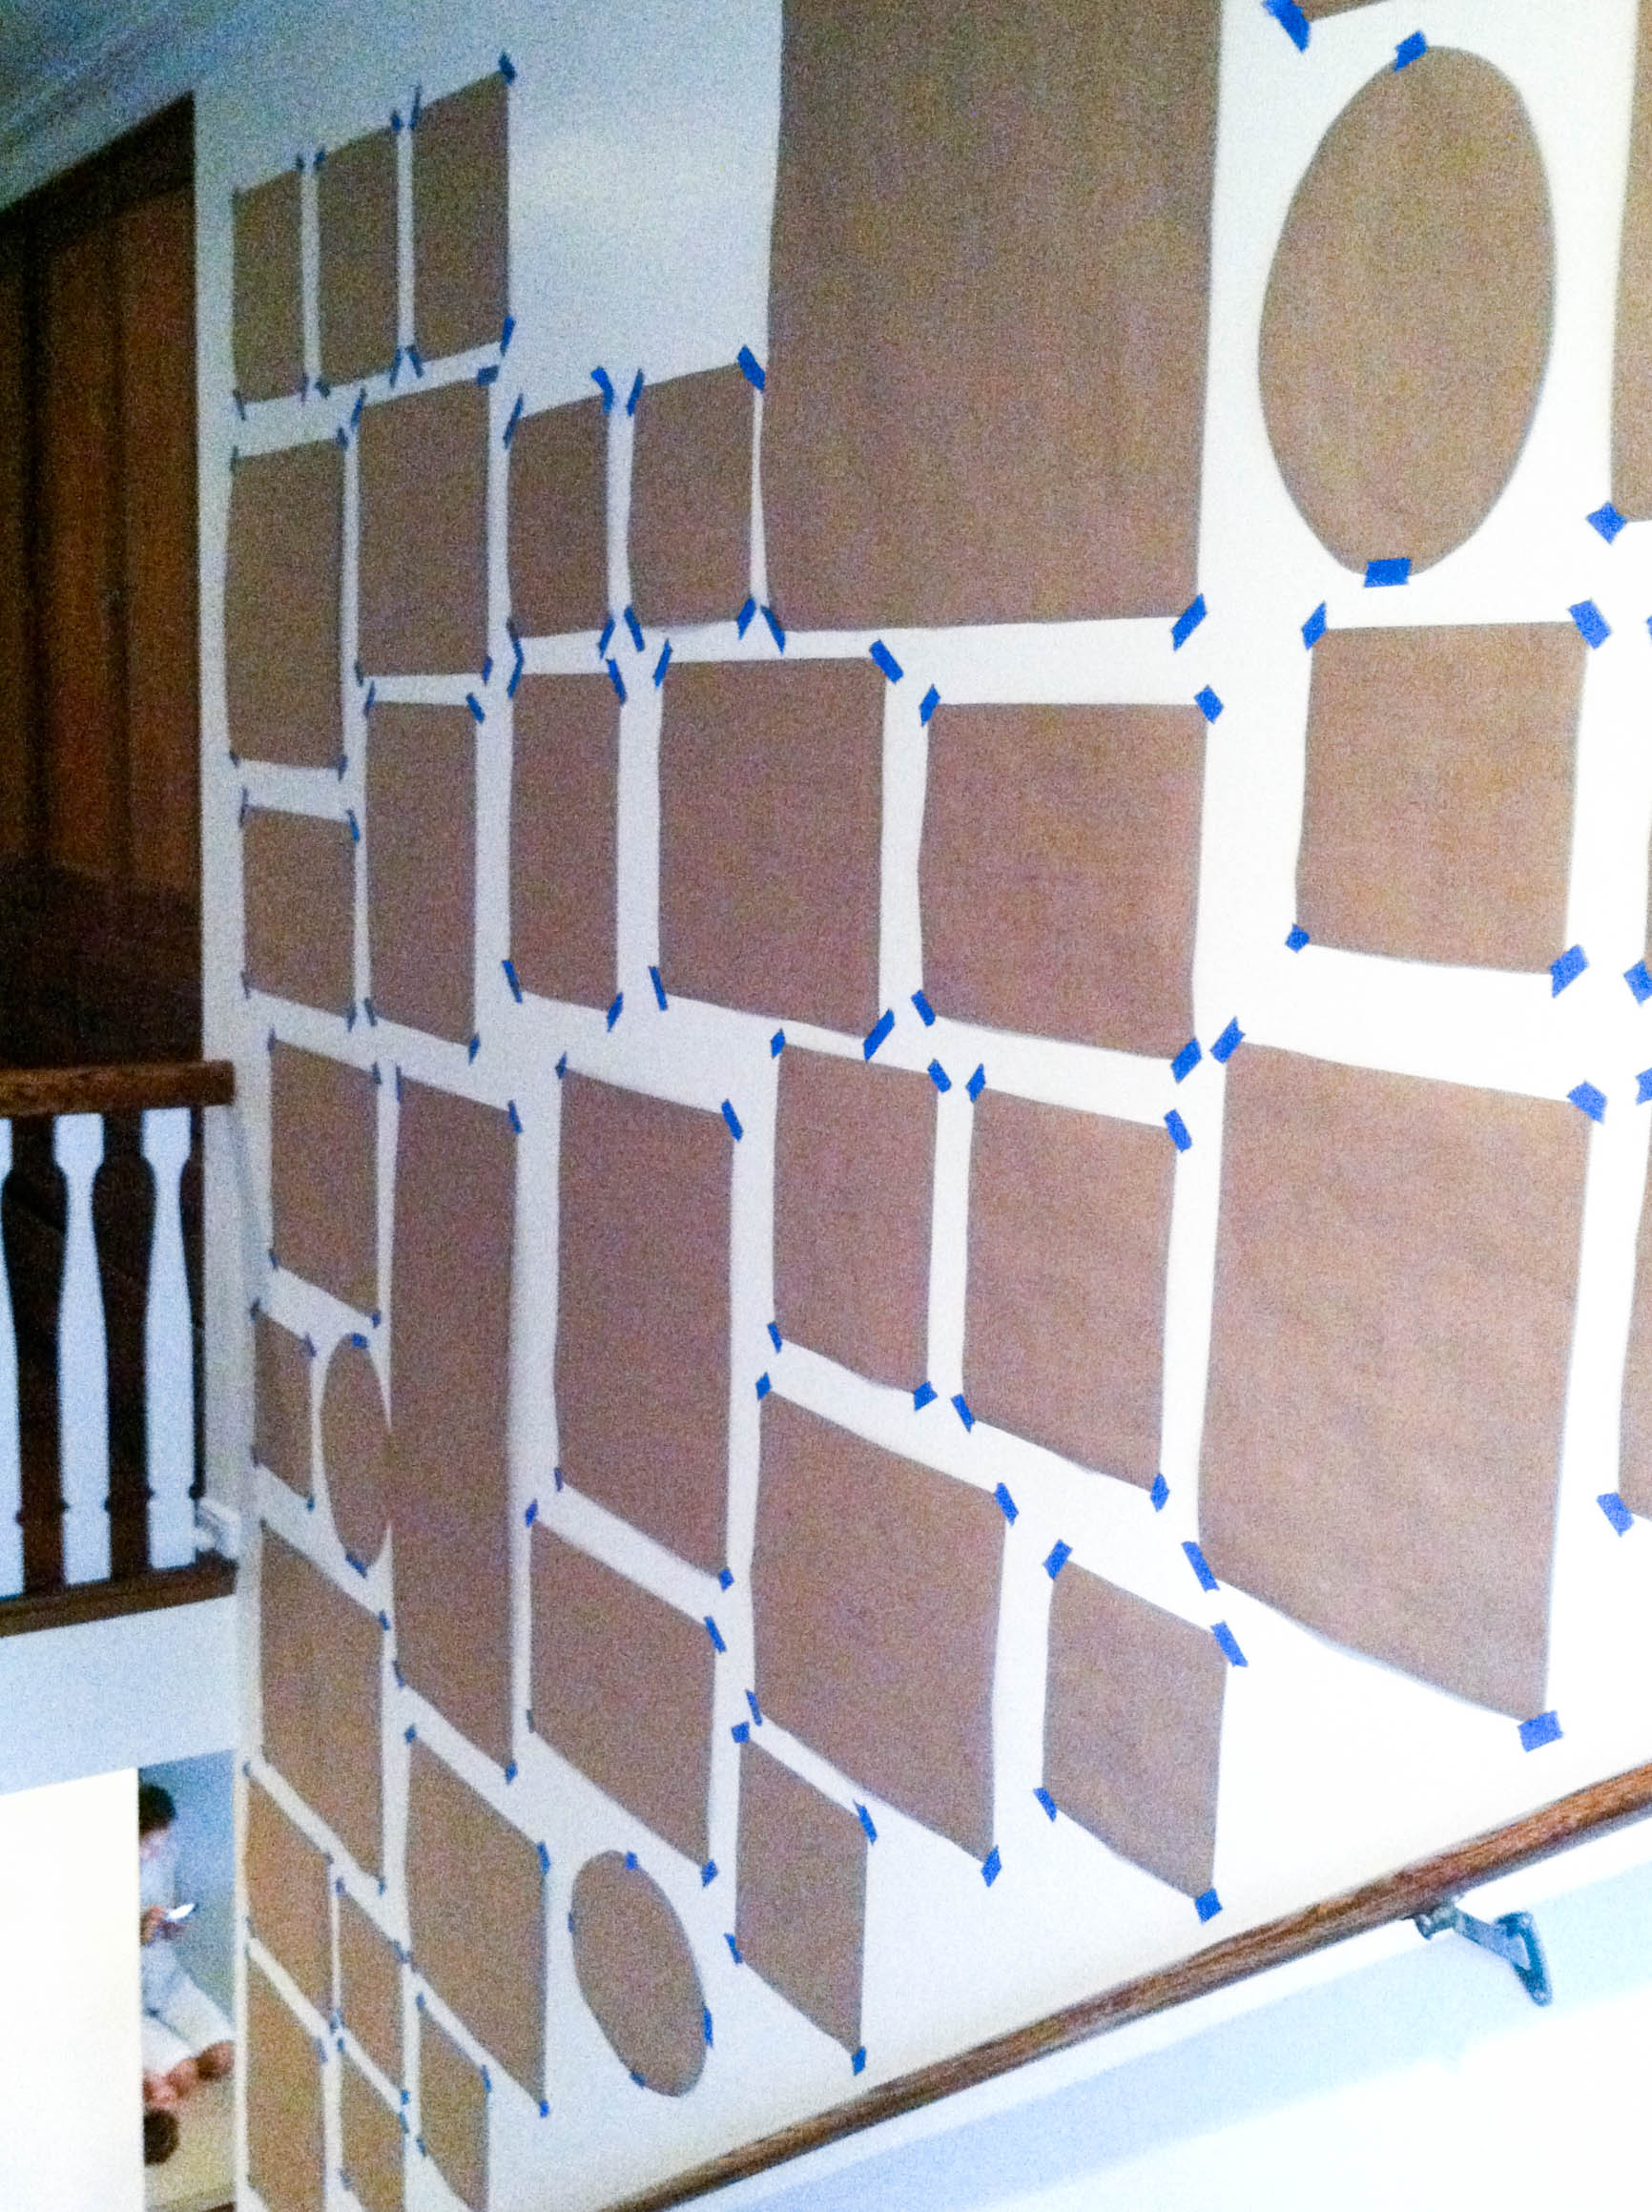
We decided to use Pottery Barn’s wood gallery frames in Espresso for a unified look. After making a list of each frame in the collection, along with their exterior measurements and what size photo they held, I traced and cut multiple templates of each one from kraft paper. Trust me: you want to lay out your design with templates that you can tape onto the wall with blue painter’s tape to decide where each should go. For you hurry-uppers, yes, it takes more time, but your walls will thank you later.
The Layout.
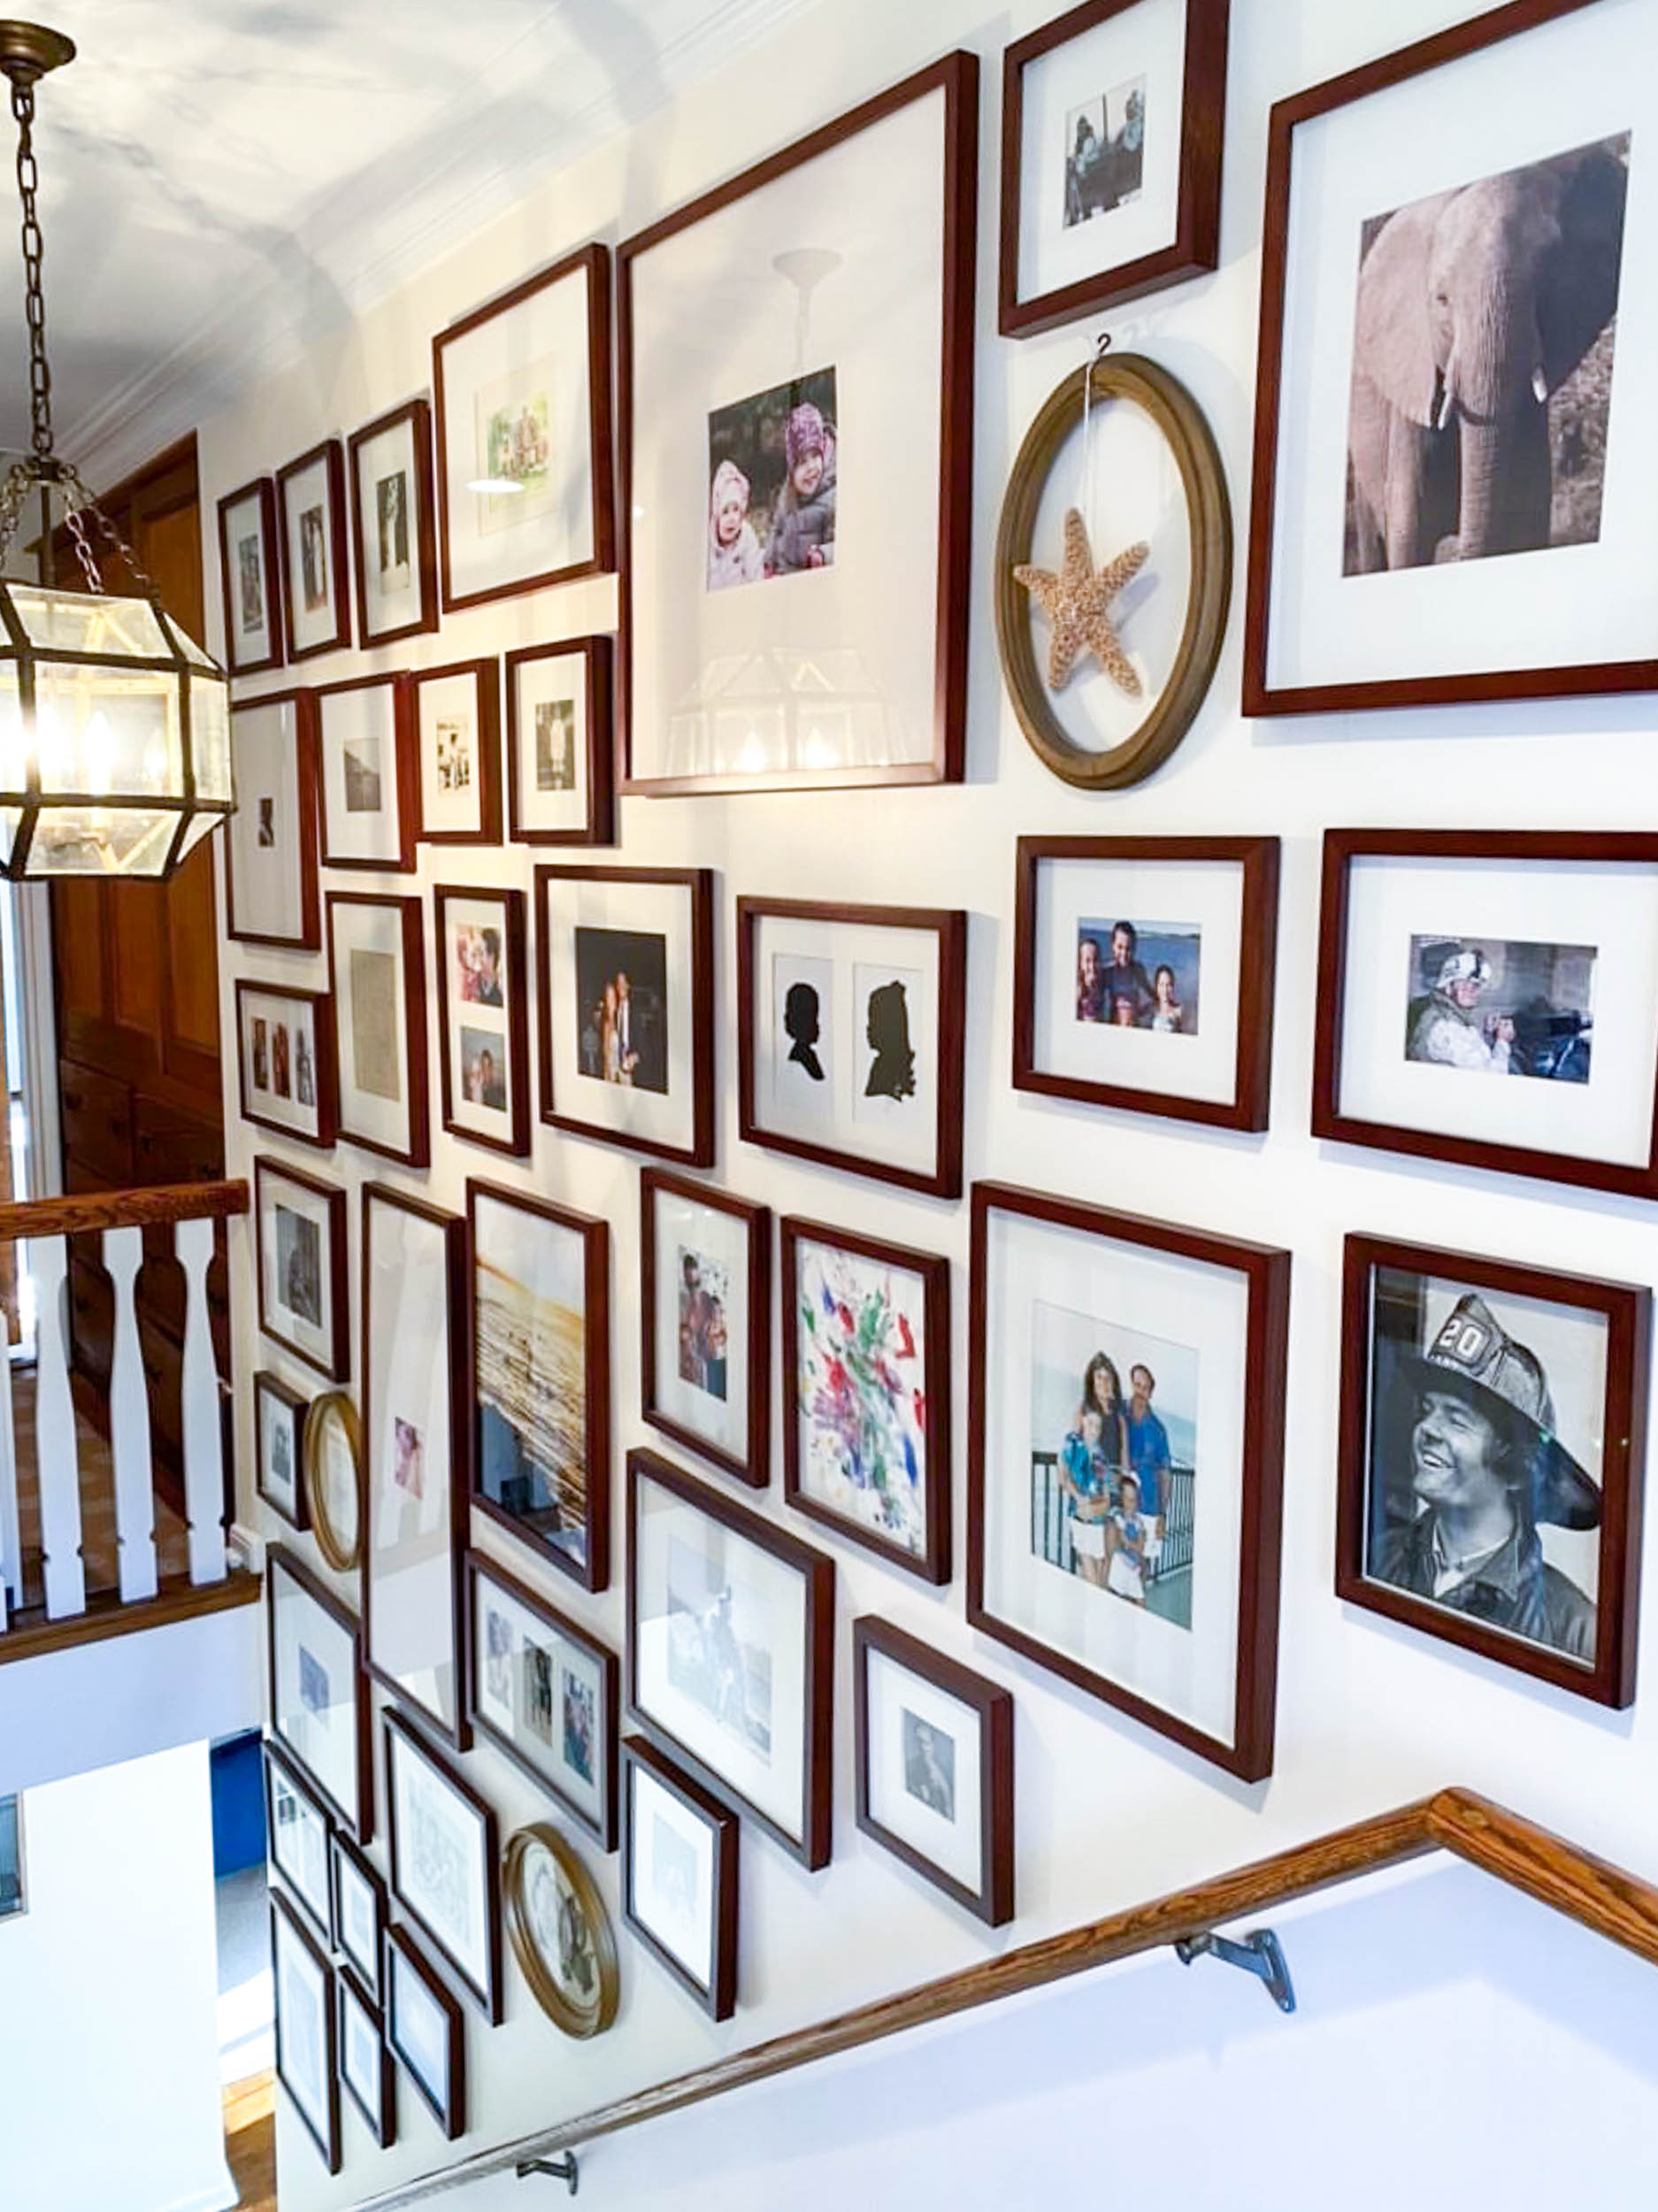
To begin the design, I started in the center of the stairwell with the inspiration-photo template and moved outward, grouping templates of varying shapes and sizes and orienting them both horizontally and vertically. Playing with symmetry and repetition, keeping a similar distance between frames, and grouping a combination of small frames next to an oversized mat frame all helped create a striking pattern.
Jen loved being part of the process as it evolved; each time a template went up, she was excited about the photo-selection possibilities. We talked through photo-story ideas to create continuity, both in terms of the layout’s architecture and the photos’ color and content. With all the ninety-degree angles, I felt that we needed some circular shapes to soften the edges and add character, so I cut rough templates for three ovals, planning to scour eBay for the frames.

The Installation.
Once the layout was complete and we were obsessed with it, it was time to purchase the frames—all forty of them! (I was so tempted to take the design all the way down to the top of stairs, but given that little hands would be holding the banister for years to come, I figured that plan wouldn’t bode well for either the glass or the little fingers.)
Now the fun really began—the time had come to fill and install the frames. As we selected a photo for a frame, we either adhered the print to its template using double-sided tape or placed a sticky note on the glass to identify it. (You could also make an inexpensive copy of the photo if the image is fragile or irreplaceable.) This reminder trick proved to be a lifesaver as we repositioned photos multiple times to create balance. Sticky tack placed on the back of the lower frames made them far less likely to be knocked off the wall in this high-traffic area.
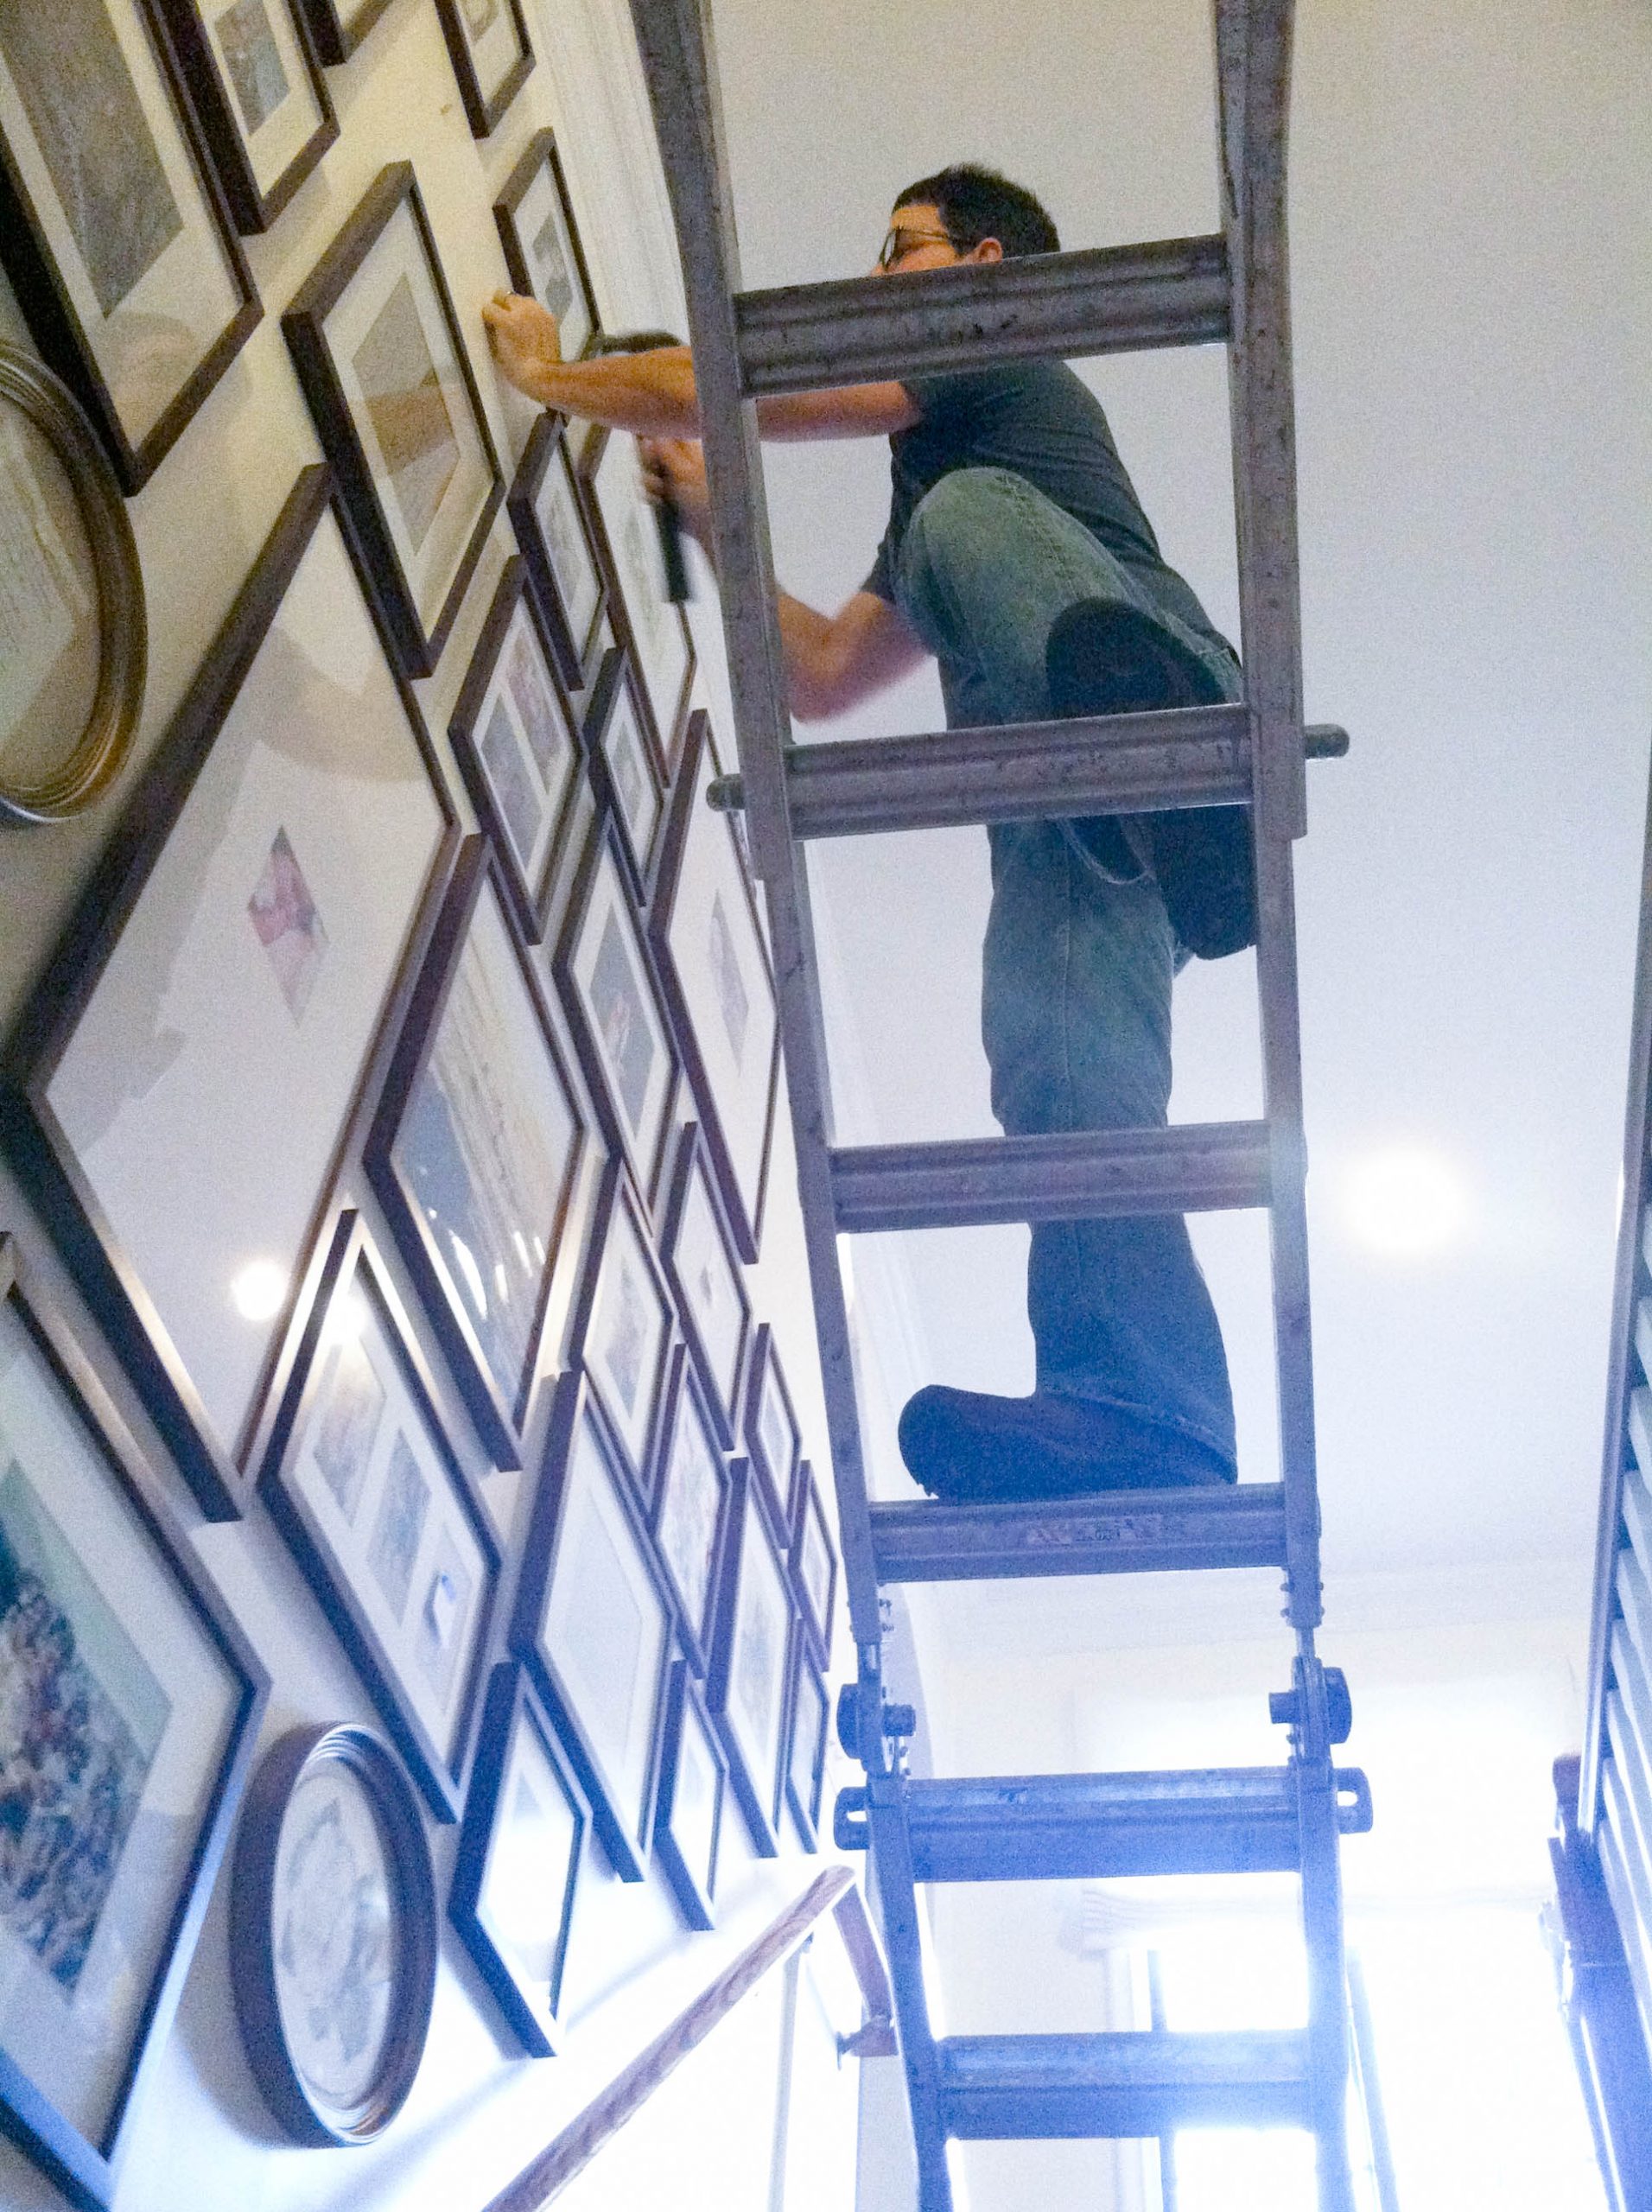
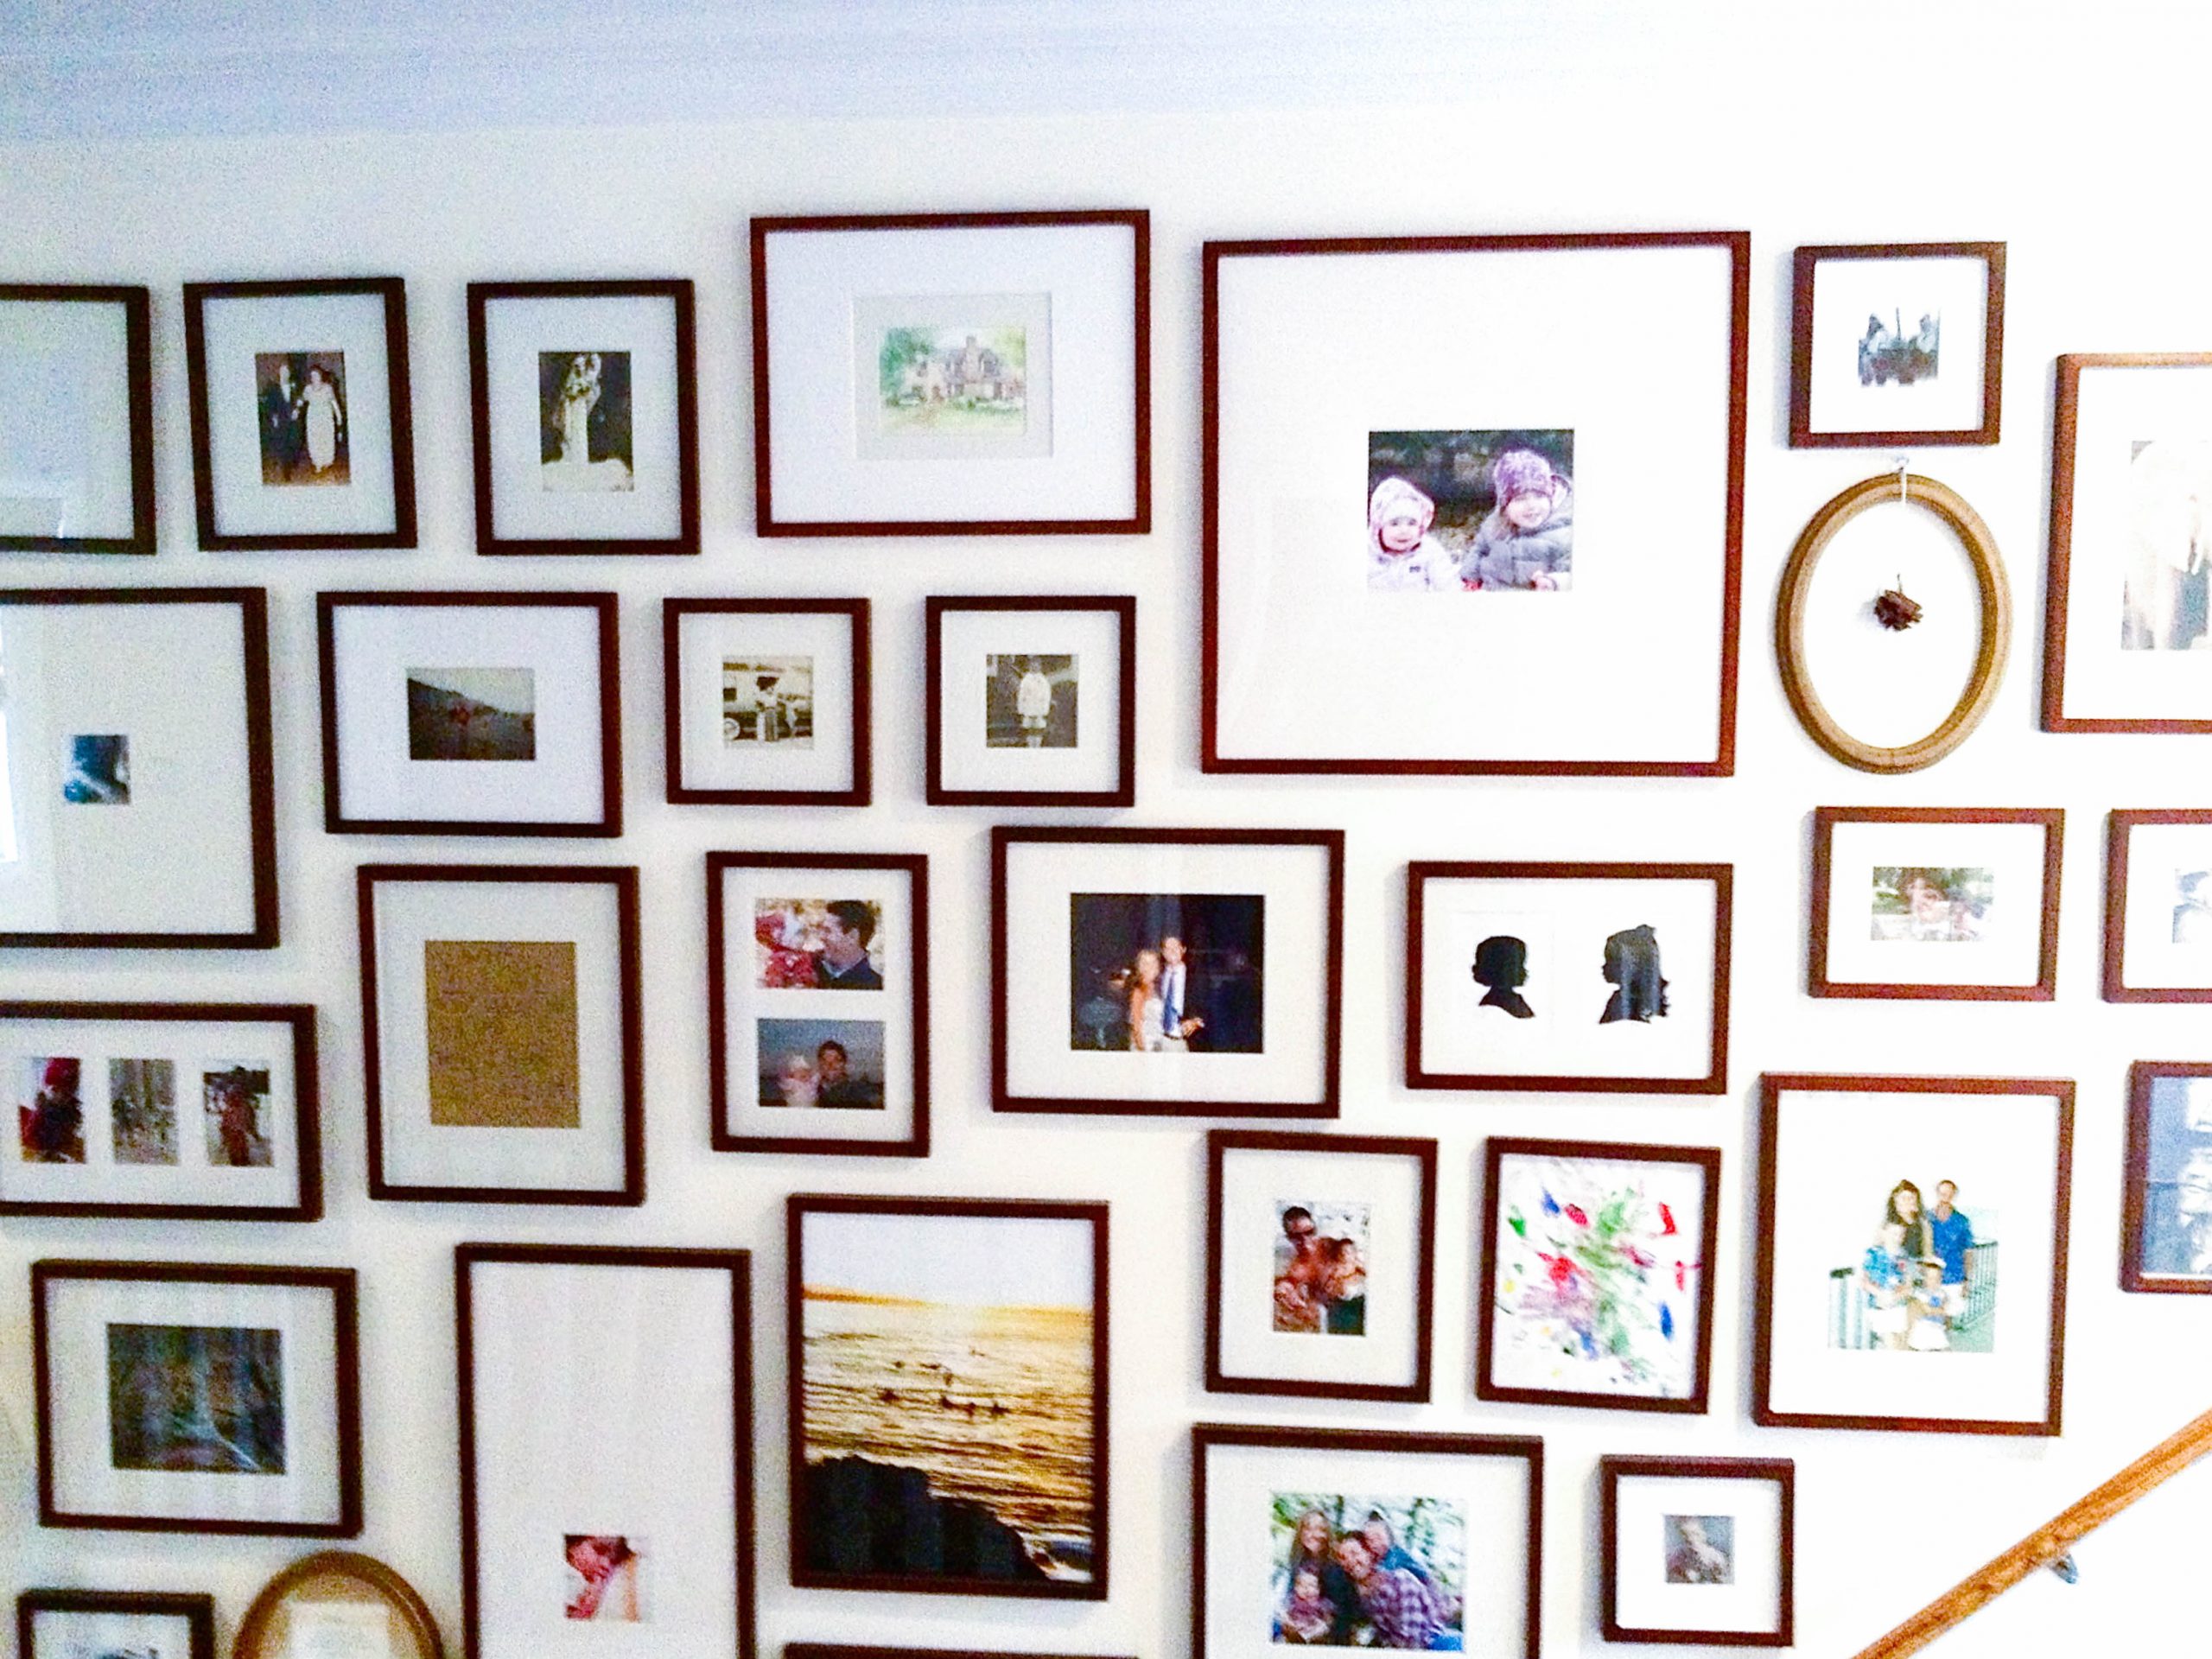
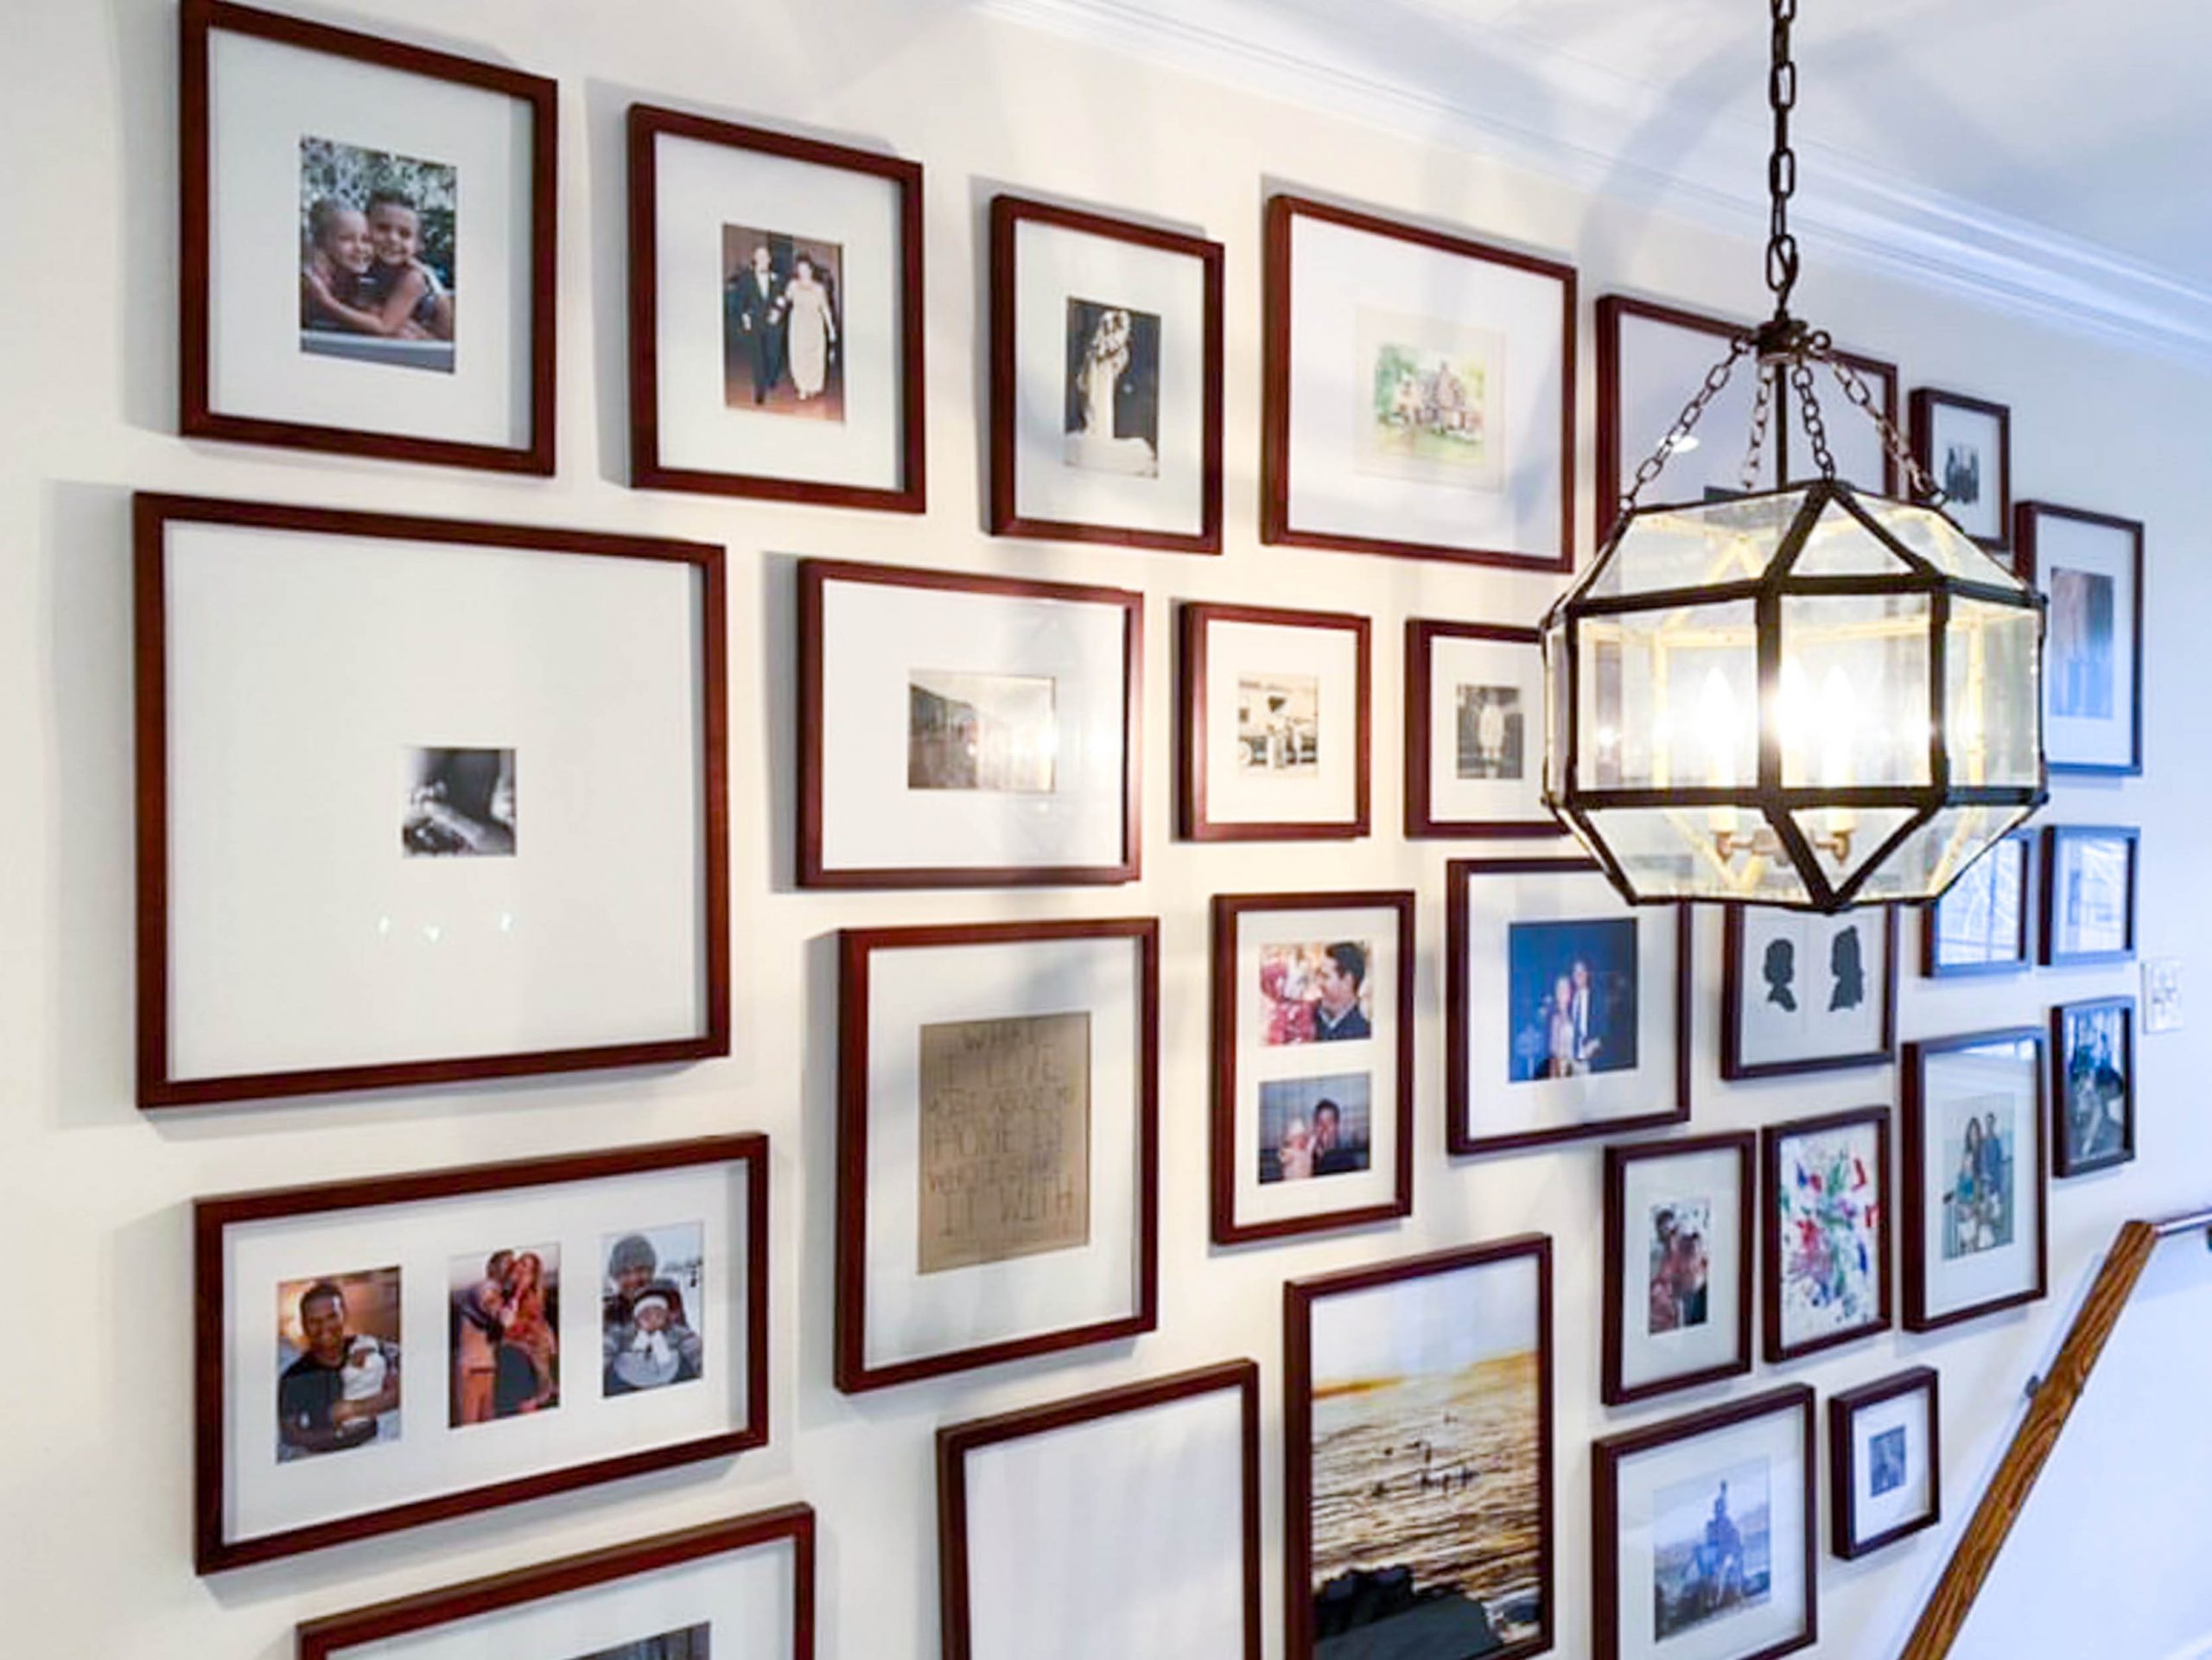
For some hard-to-reach spaces, we needed to hire a contractor to place the frames (you may have noticed the empty spot top and center, which we couldn’t even reach to hang a template). We predetermined that we’d fill those frames with permanent photos. For example, we grouped both sides of their family’s three generations of wedding photos side-by-side in identical frames. Meanwhile, we filled frames in easy-to-reach spaces with pictures that could be updated often—like current photos of the girls.
Always hire a licensed contractor when you have any major work to do—including putting holes in your walls. They’ll be sure that the proper mounting hardware is used to guarantee a safe, sturdy installation of even the heaviest items.
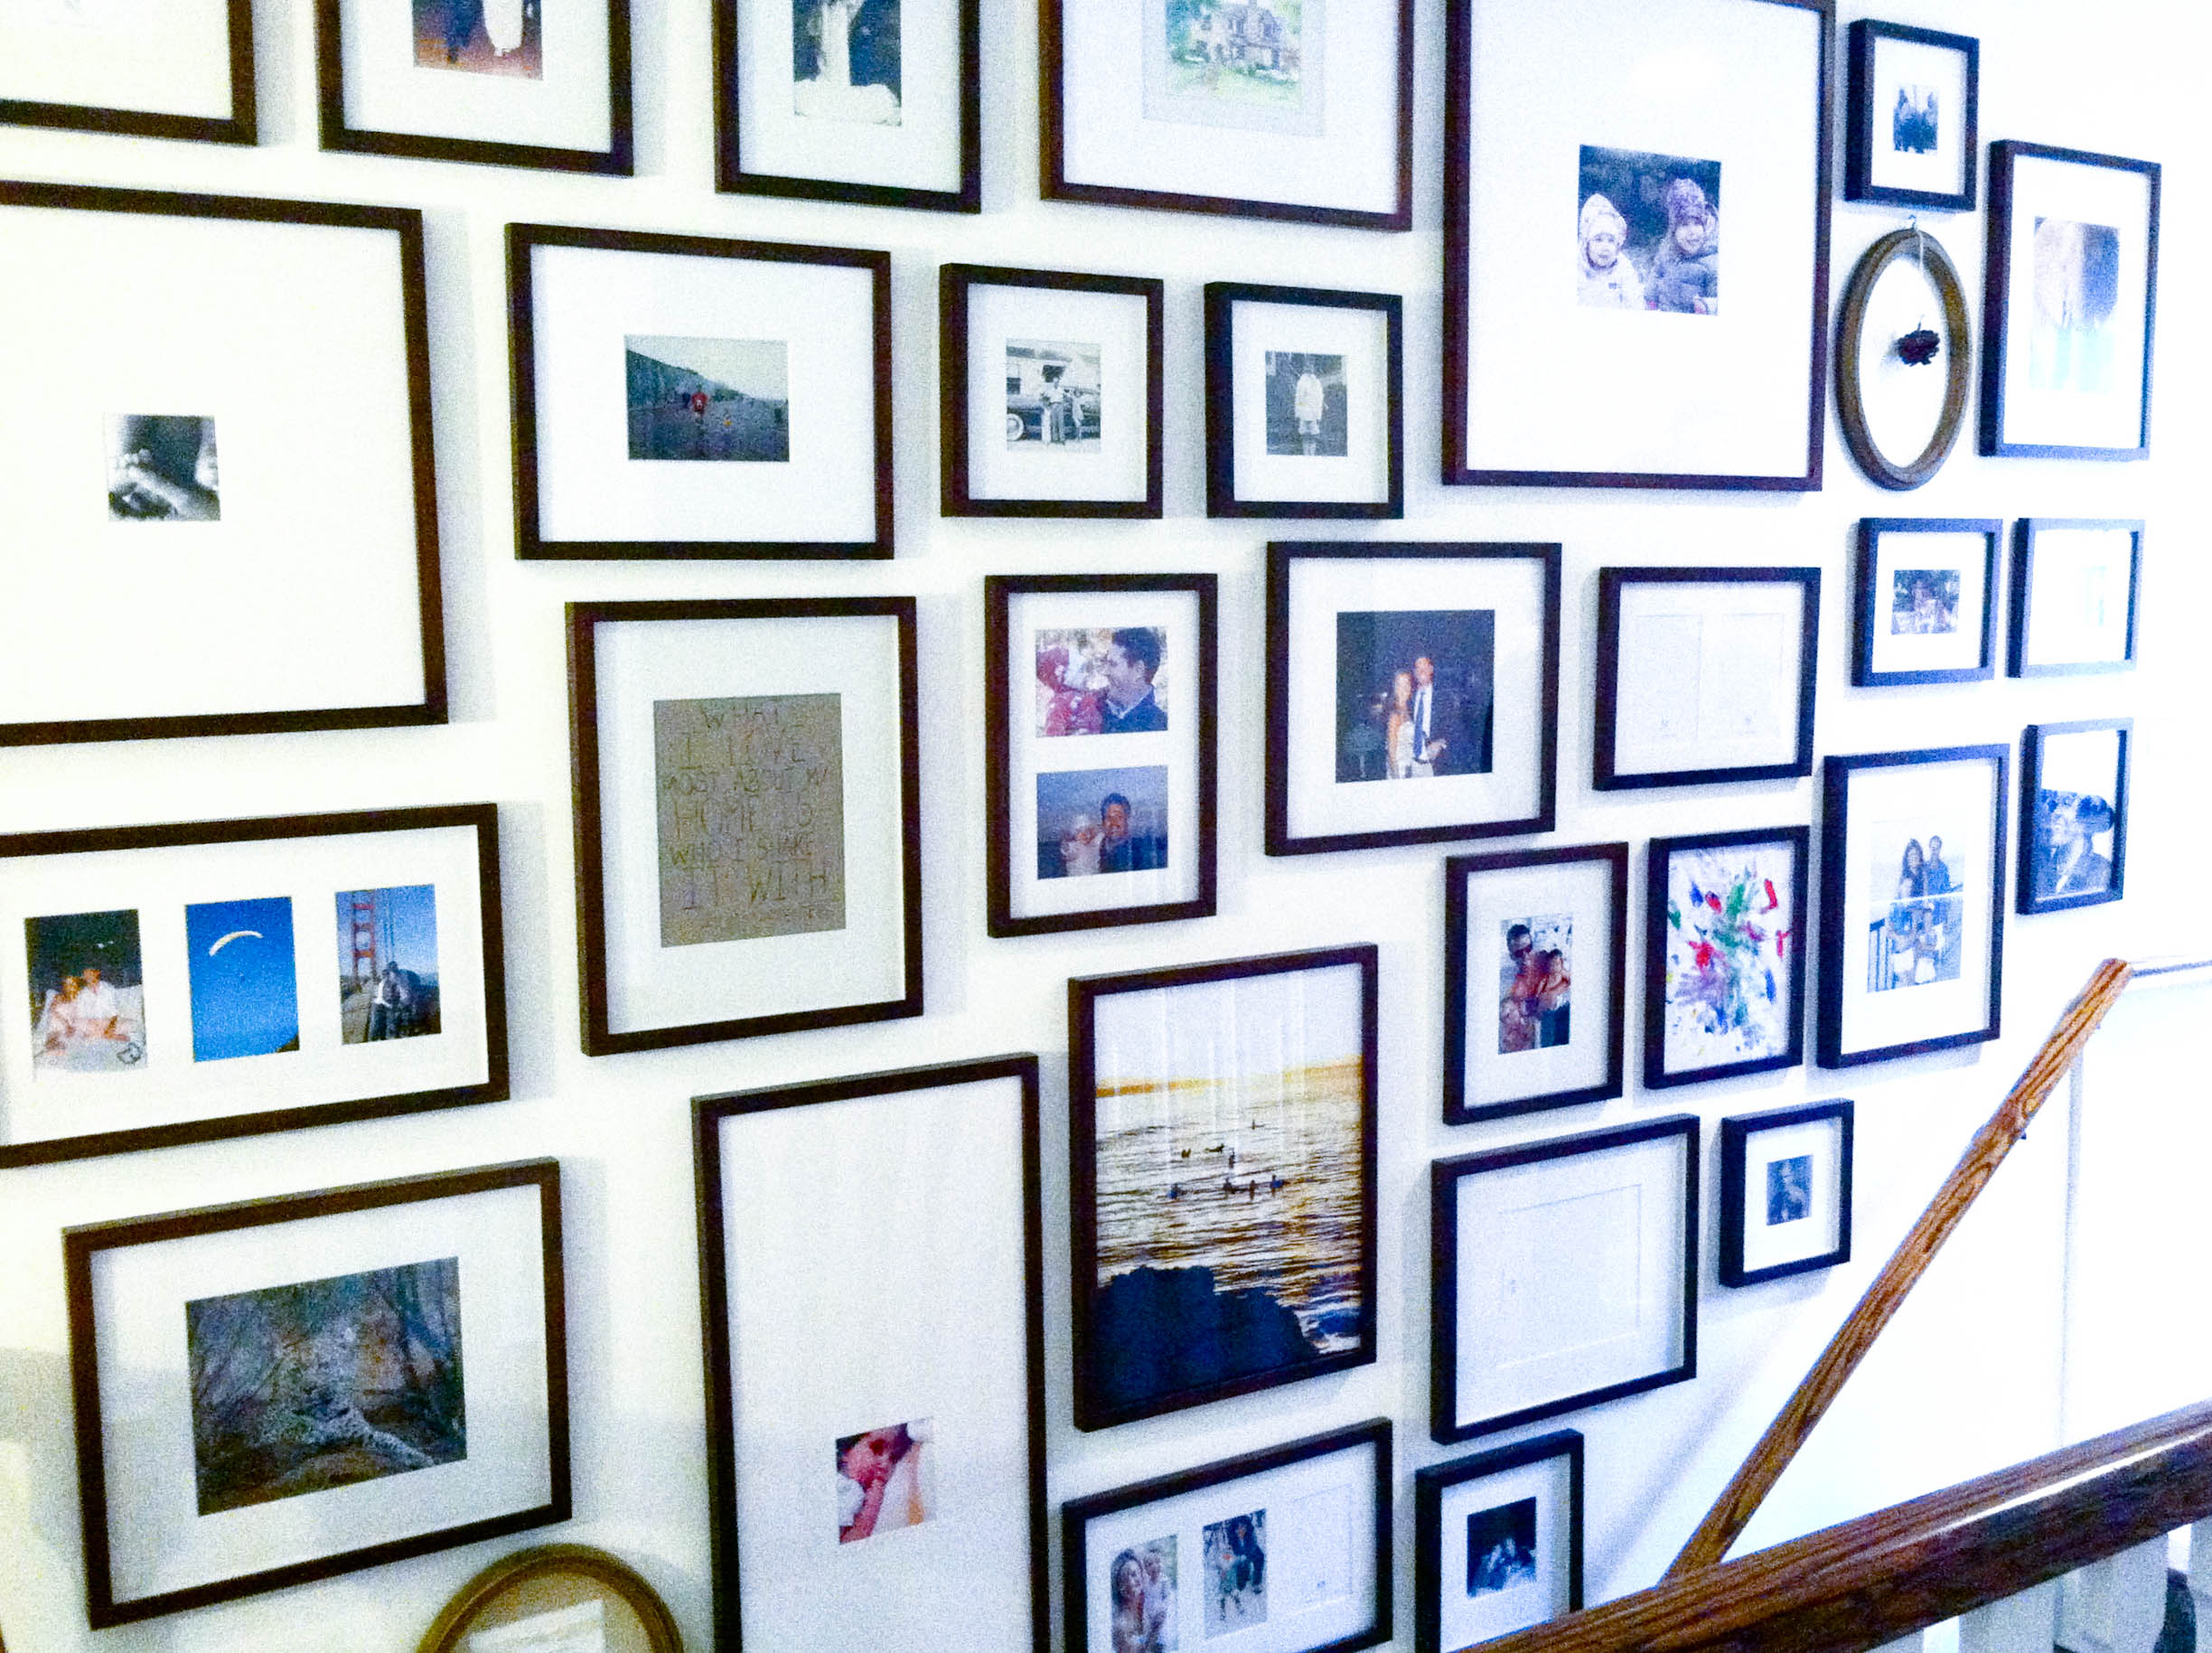
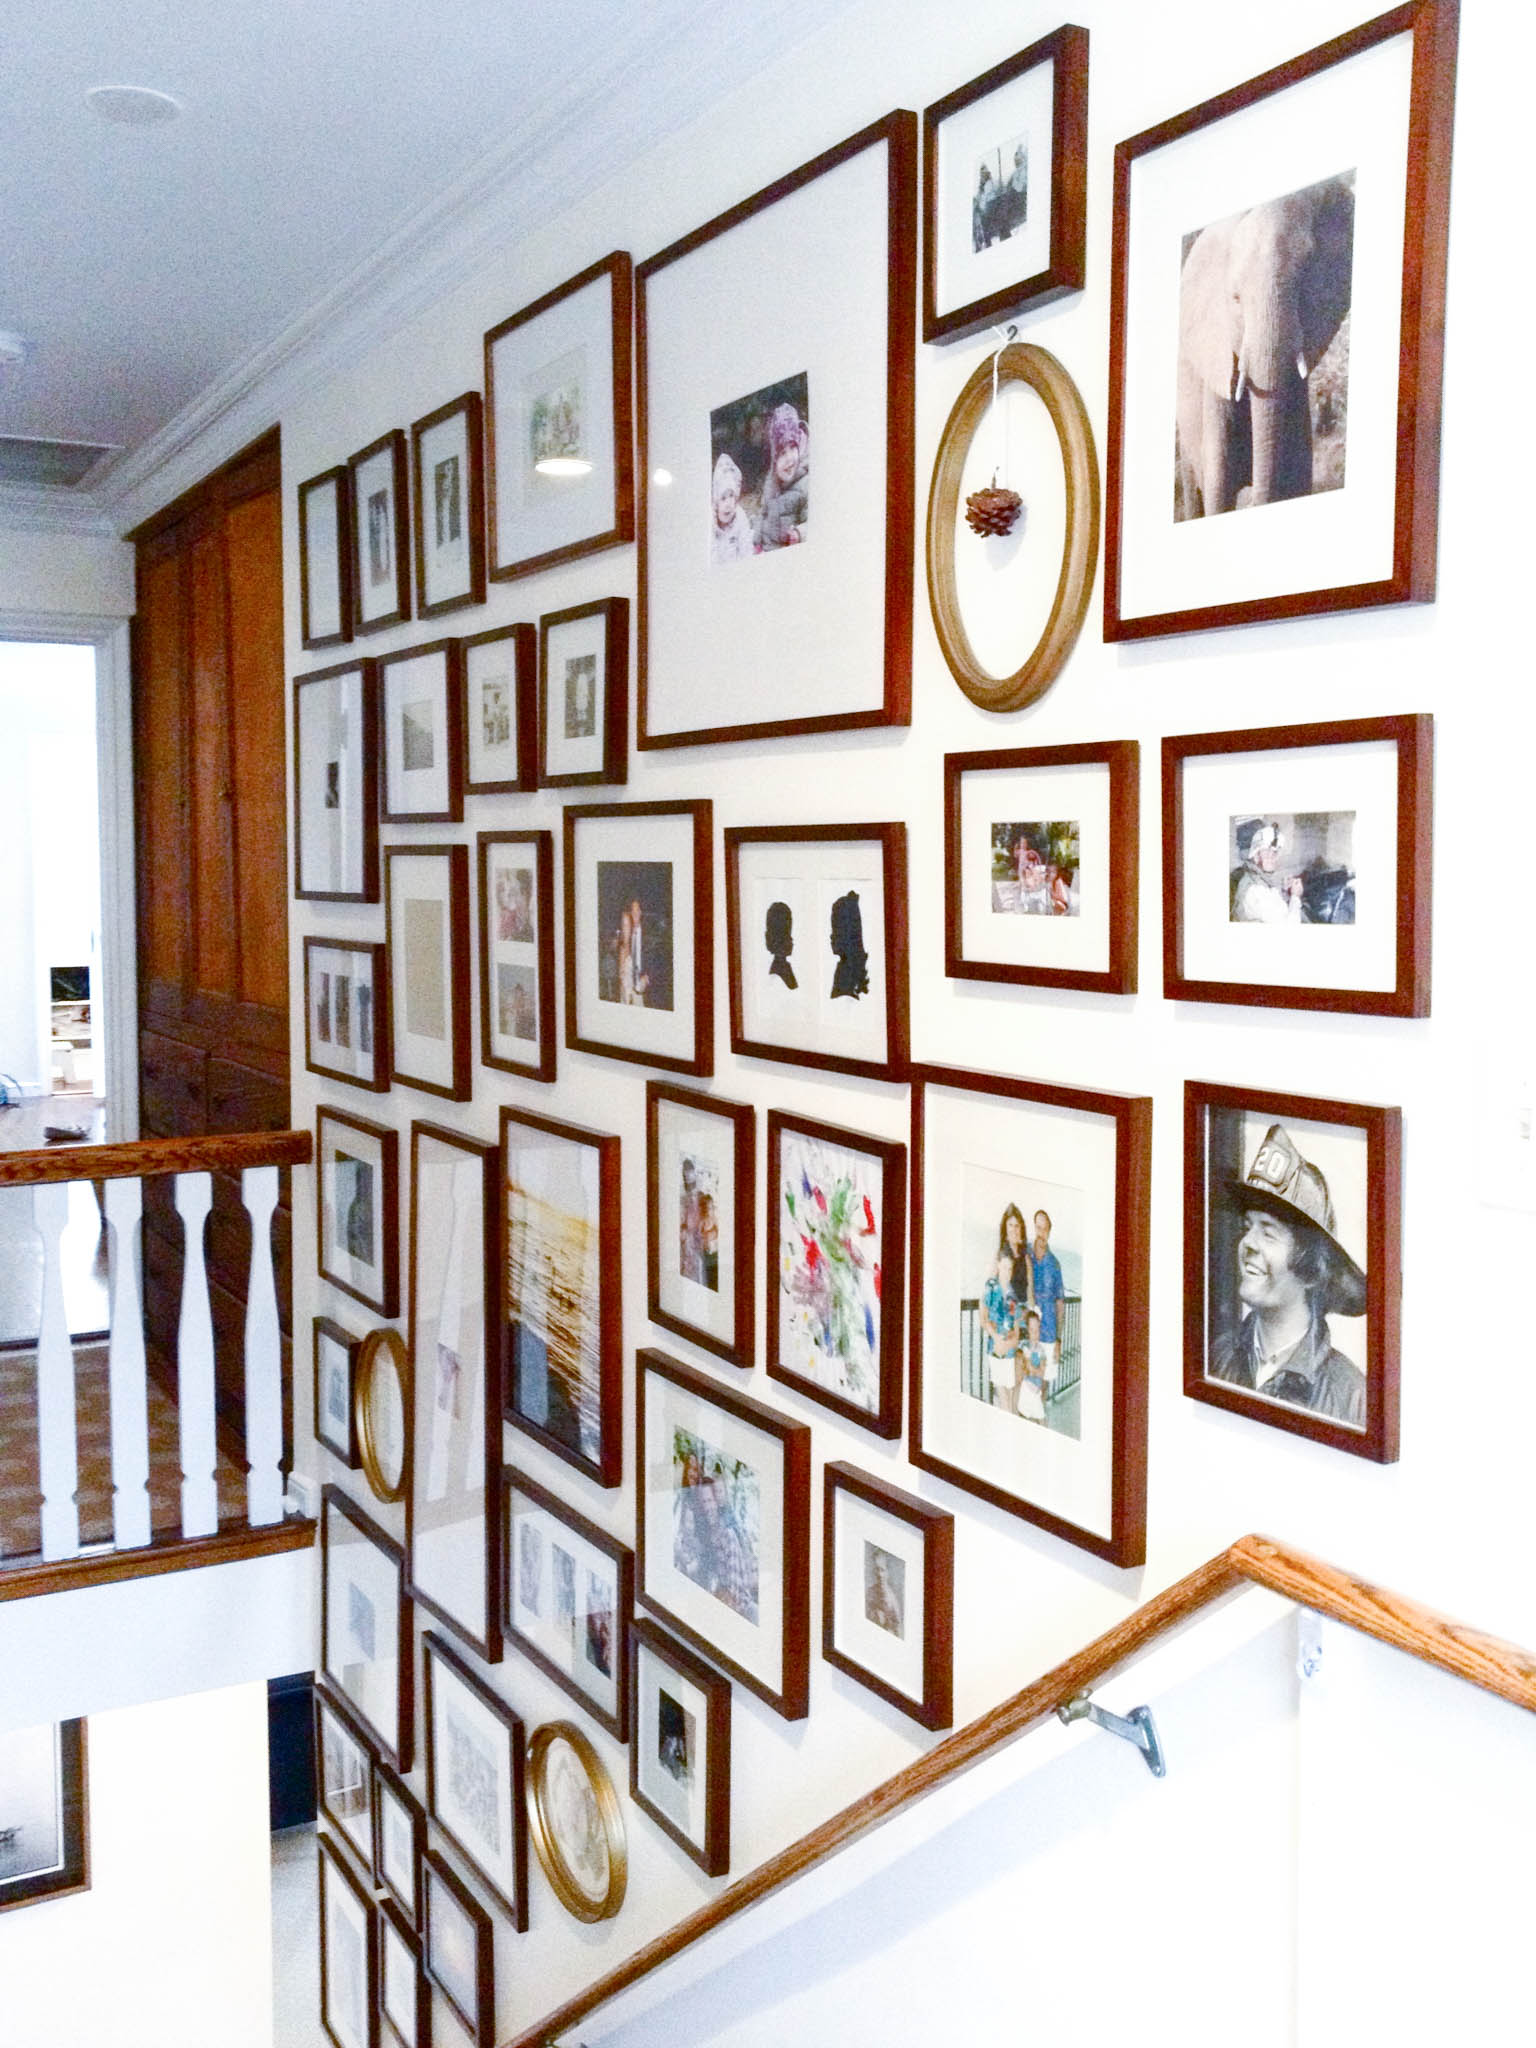
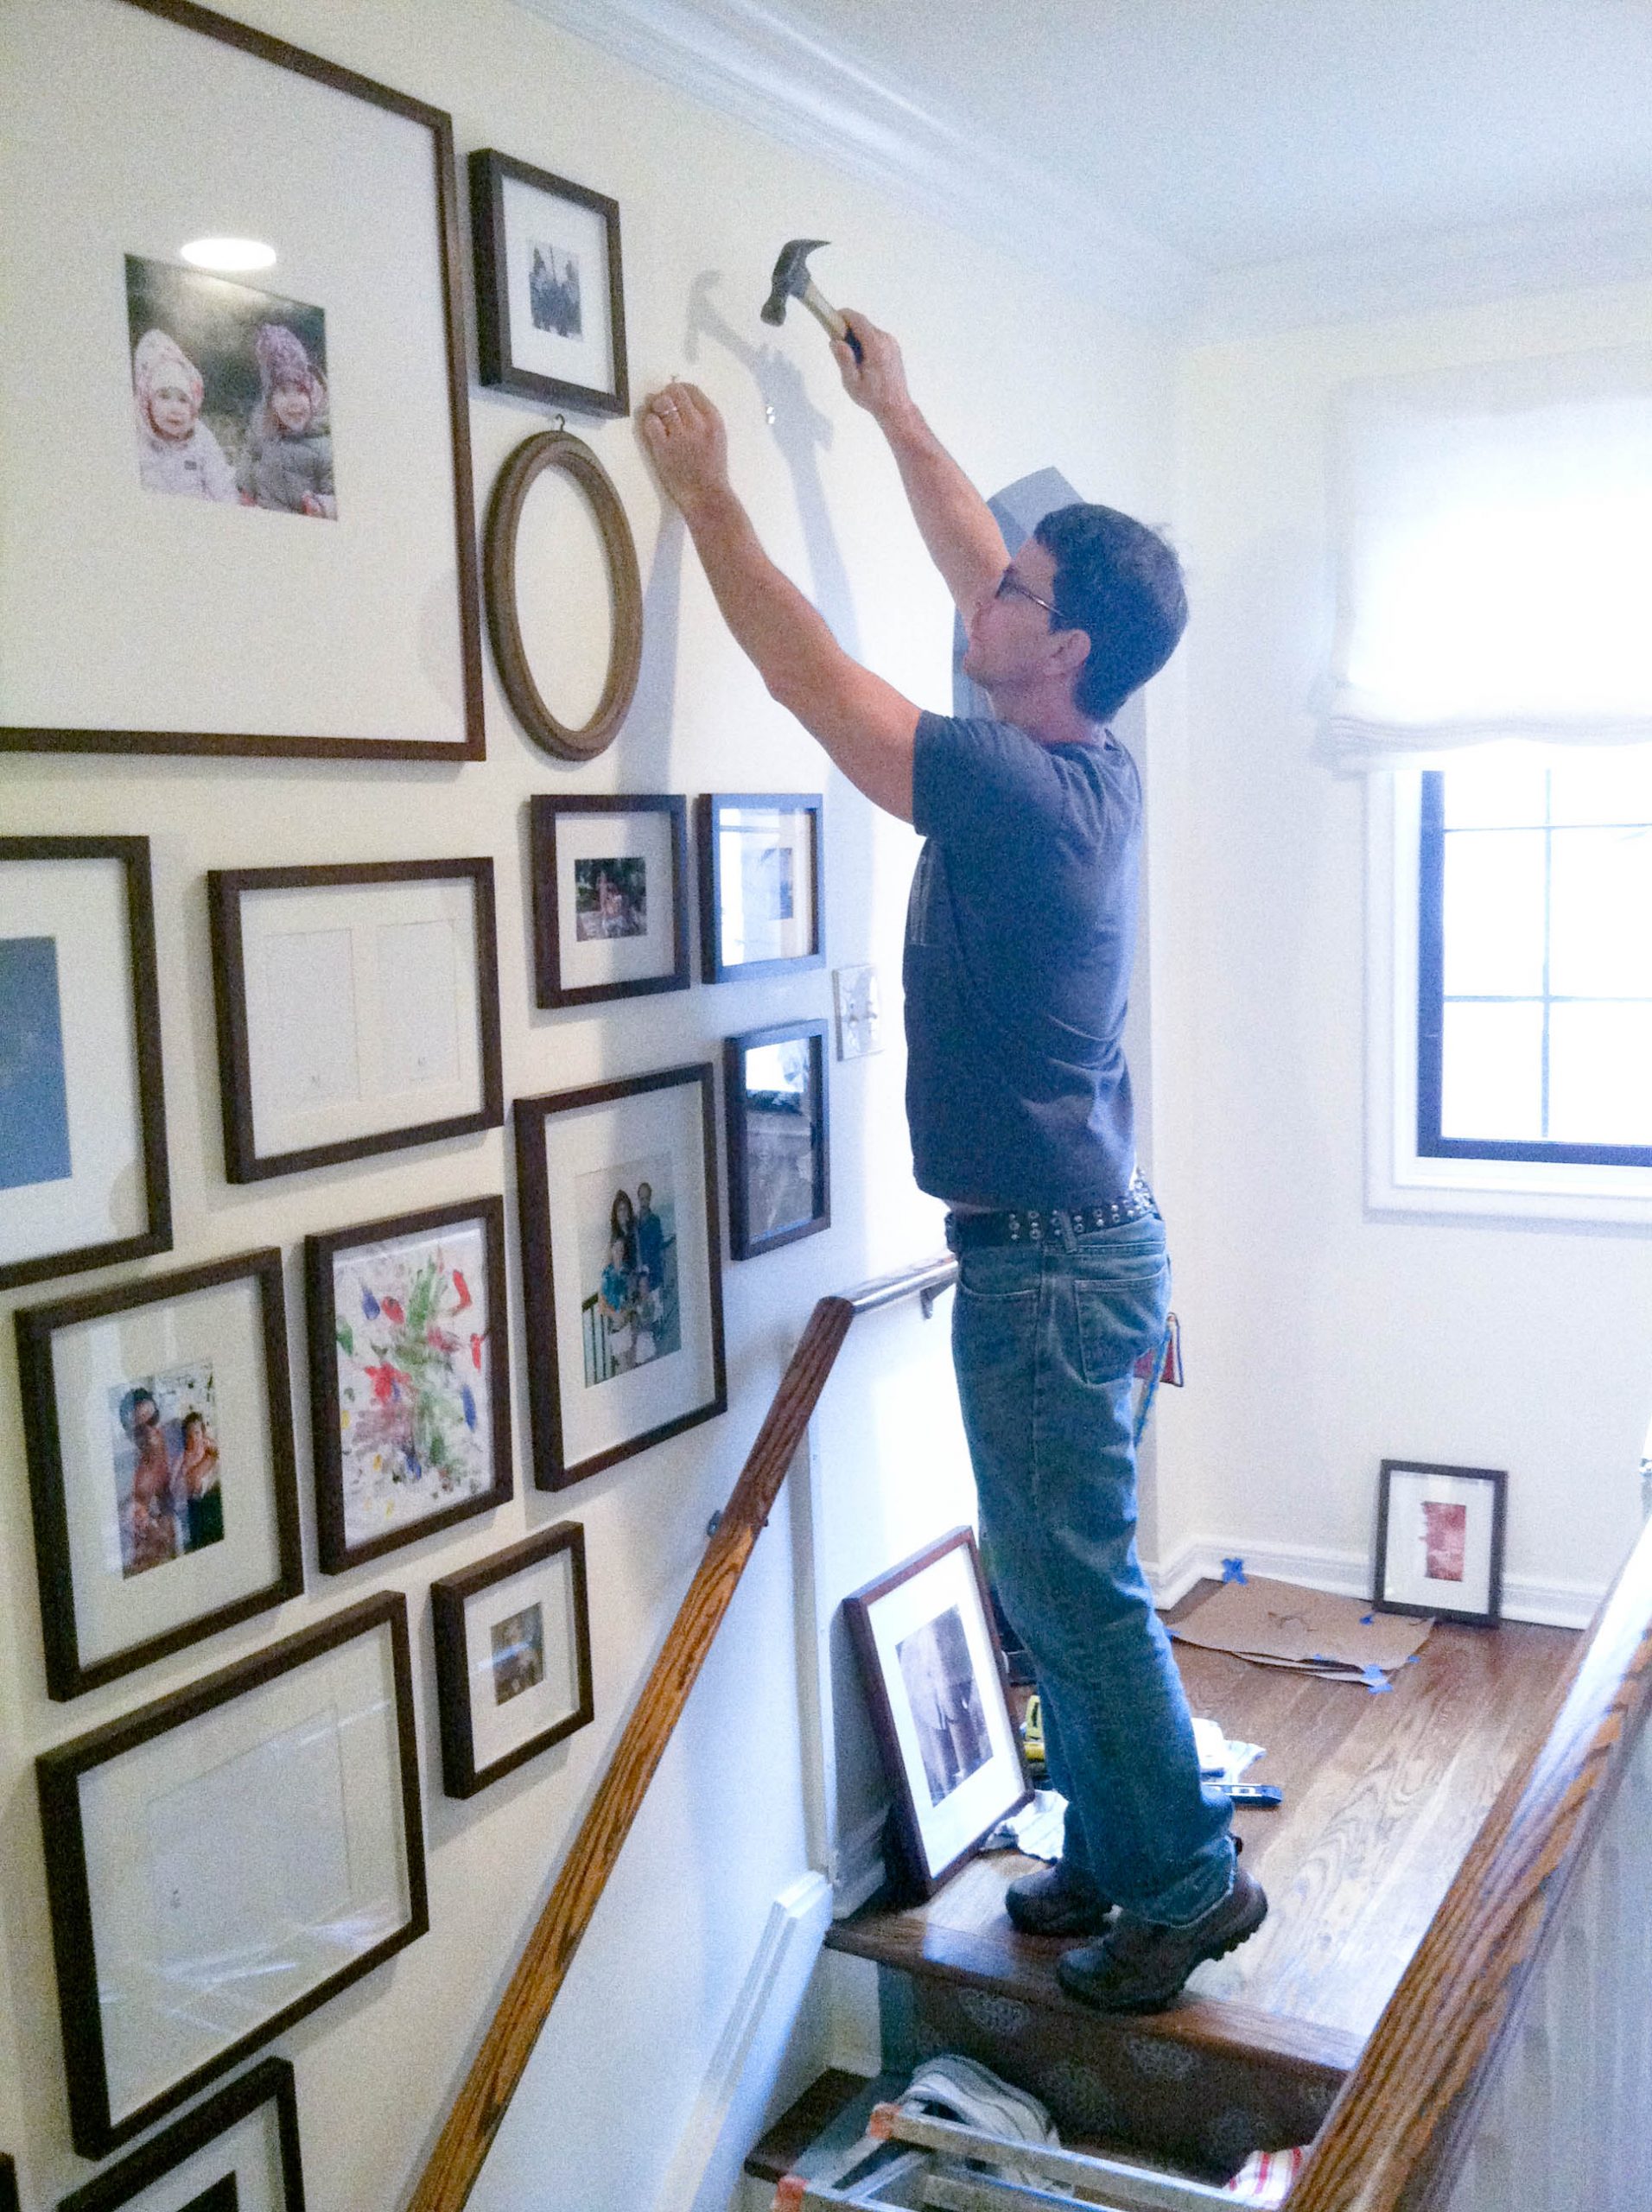
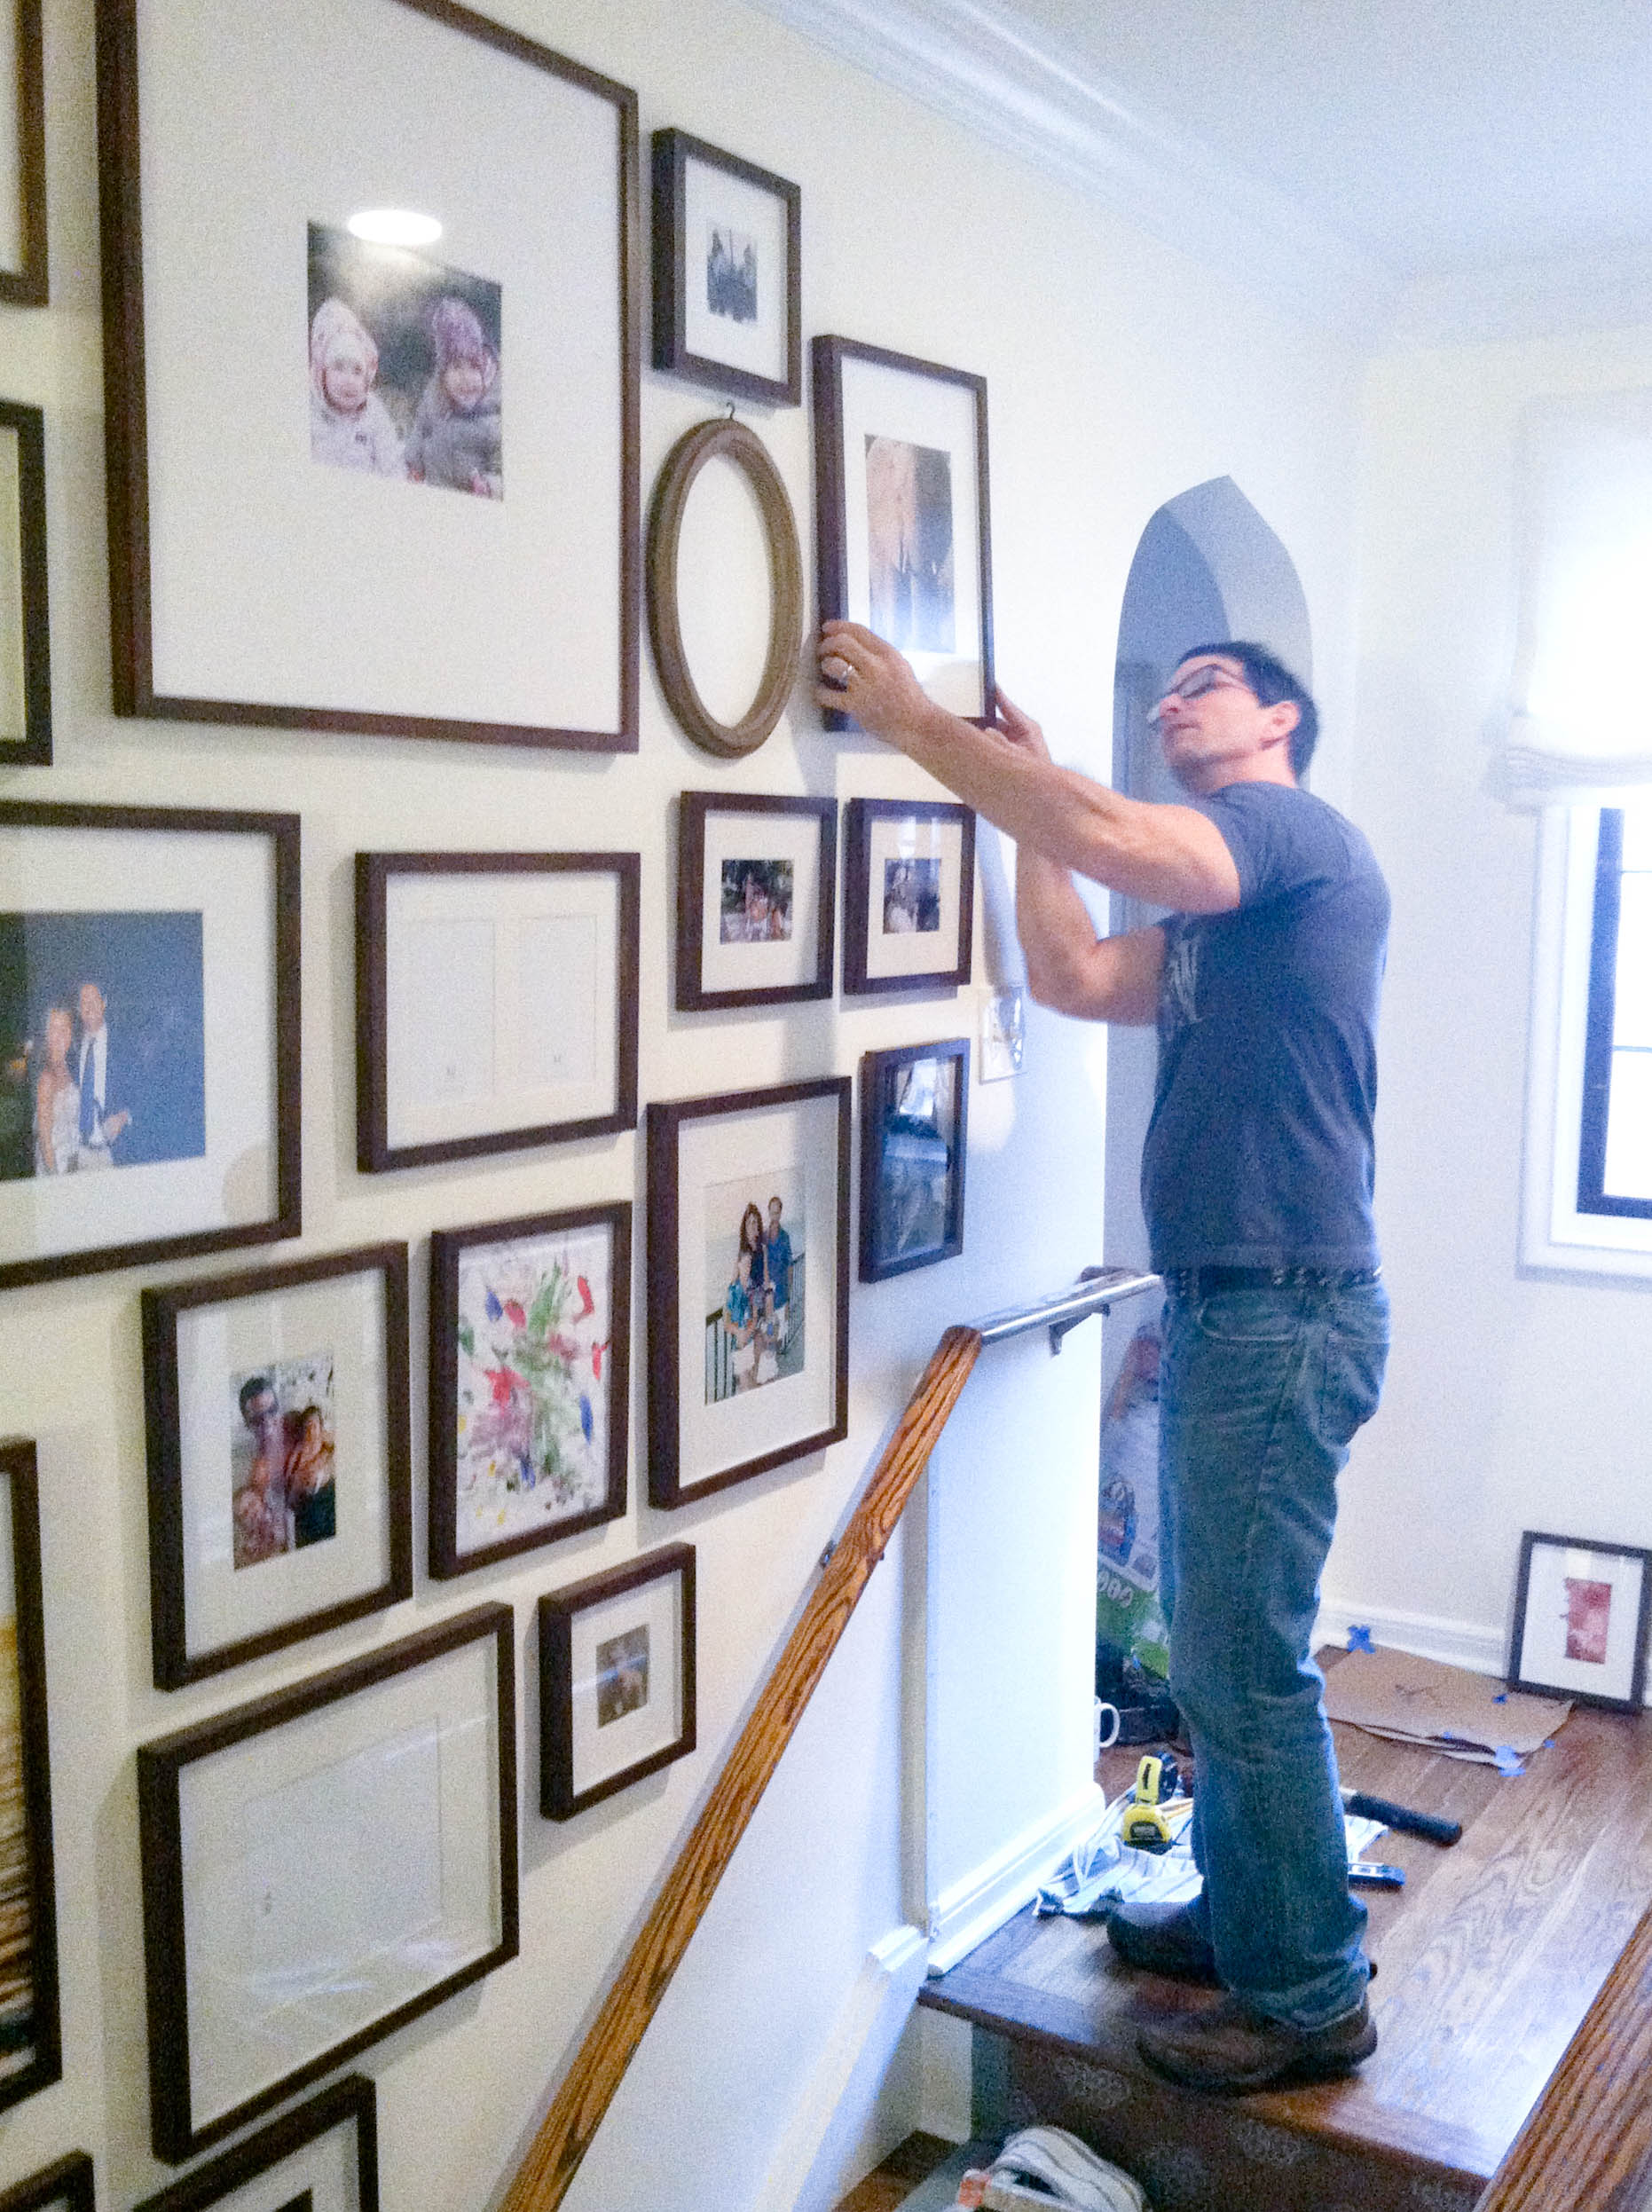
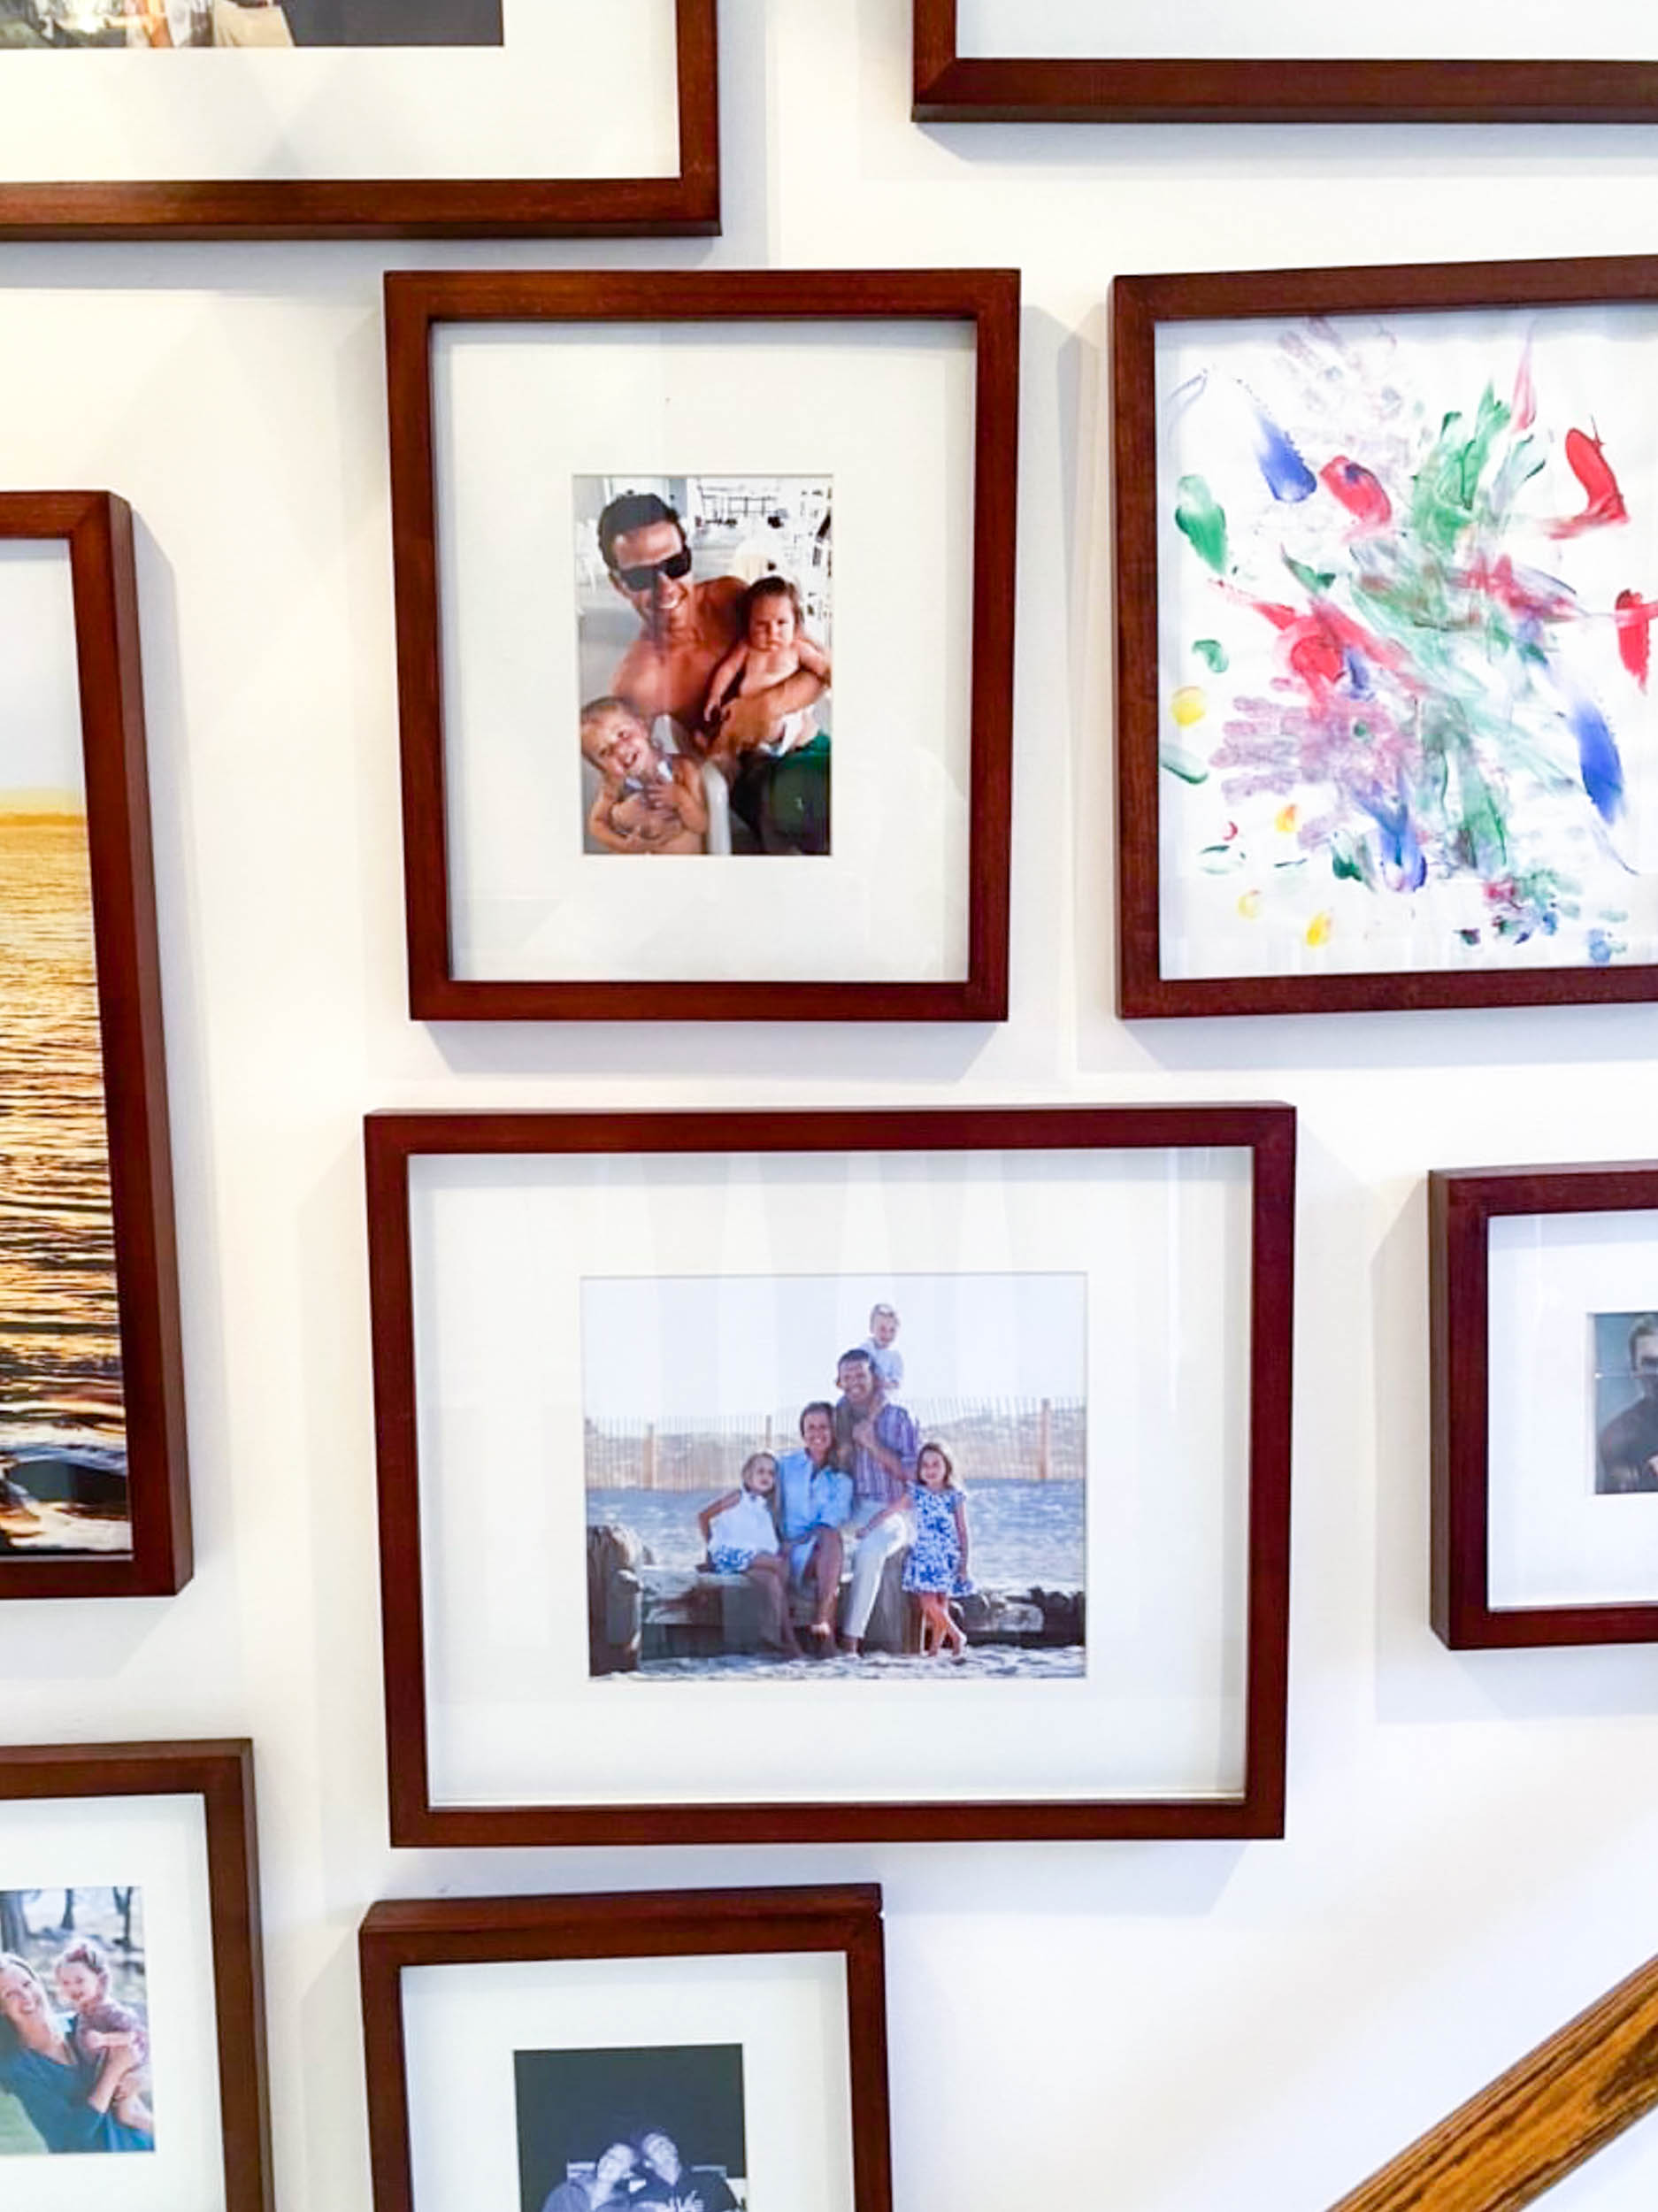
You can see how a series of very different photos—color and black-and-white family photos, Instagram photos, century-old photos, drawings, and art—along with multiple-sized frames and mats, are all pulled together by a unifying thread: the same color and style frame, with a few vintage gold oval-shaped frames, sprinkled in for drama.
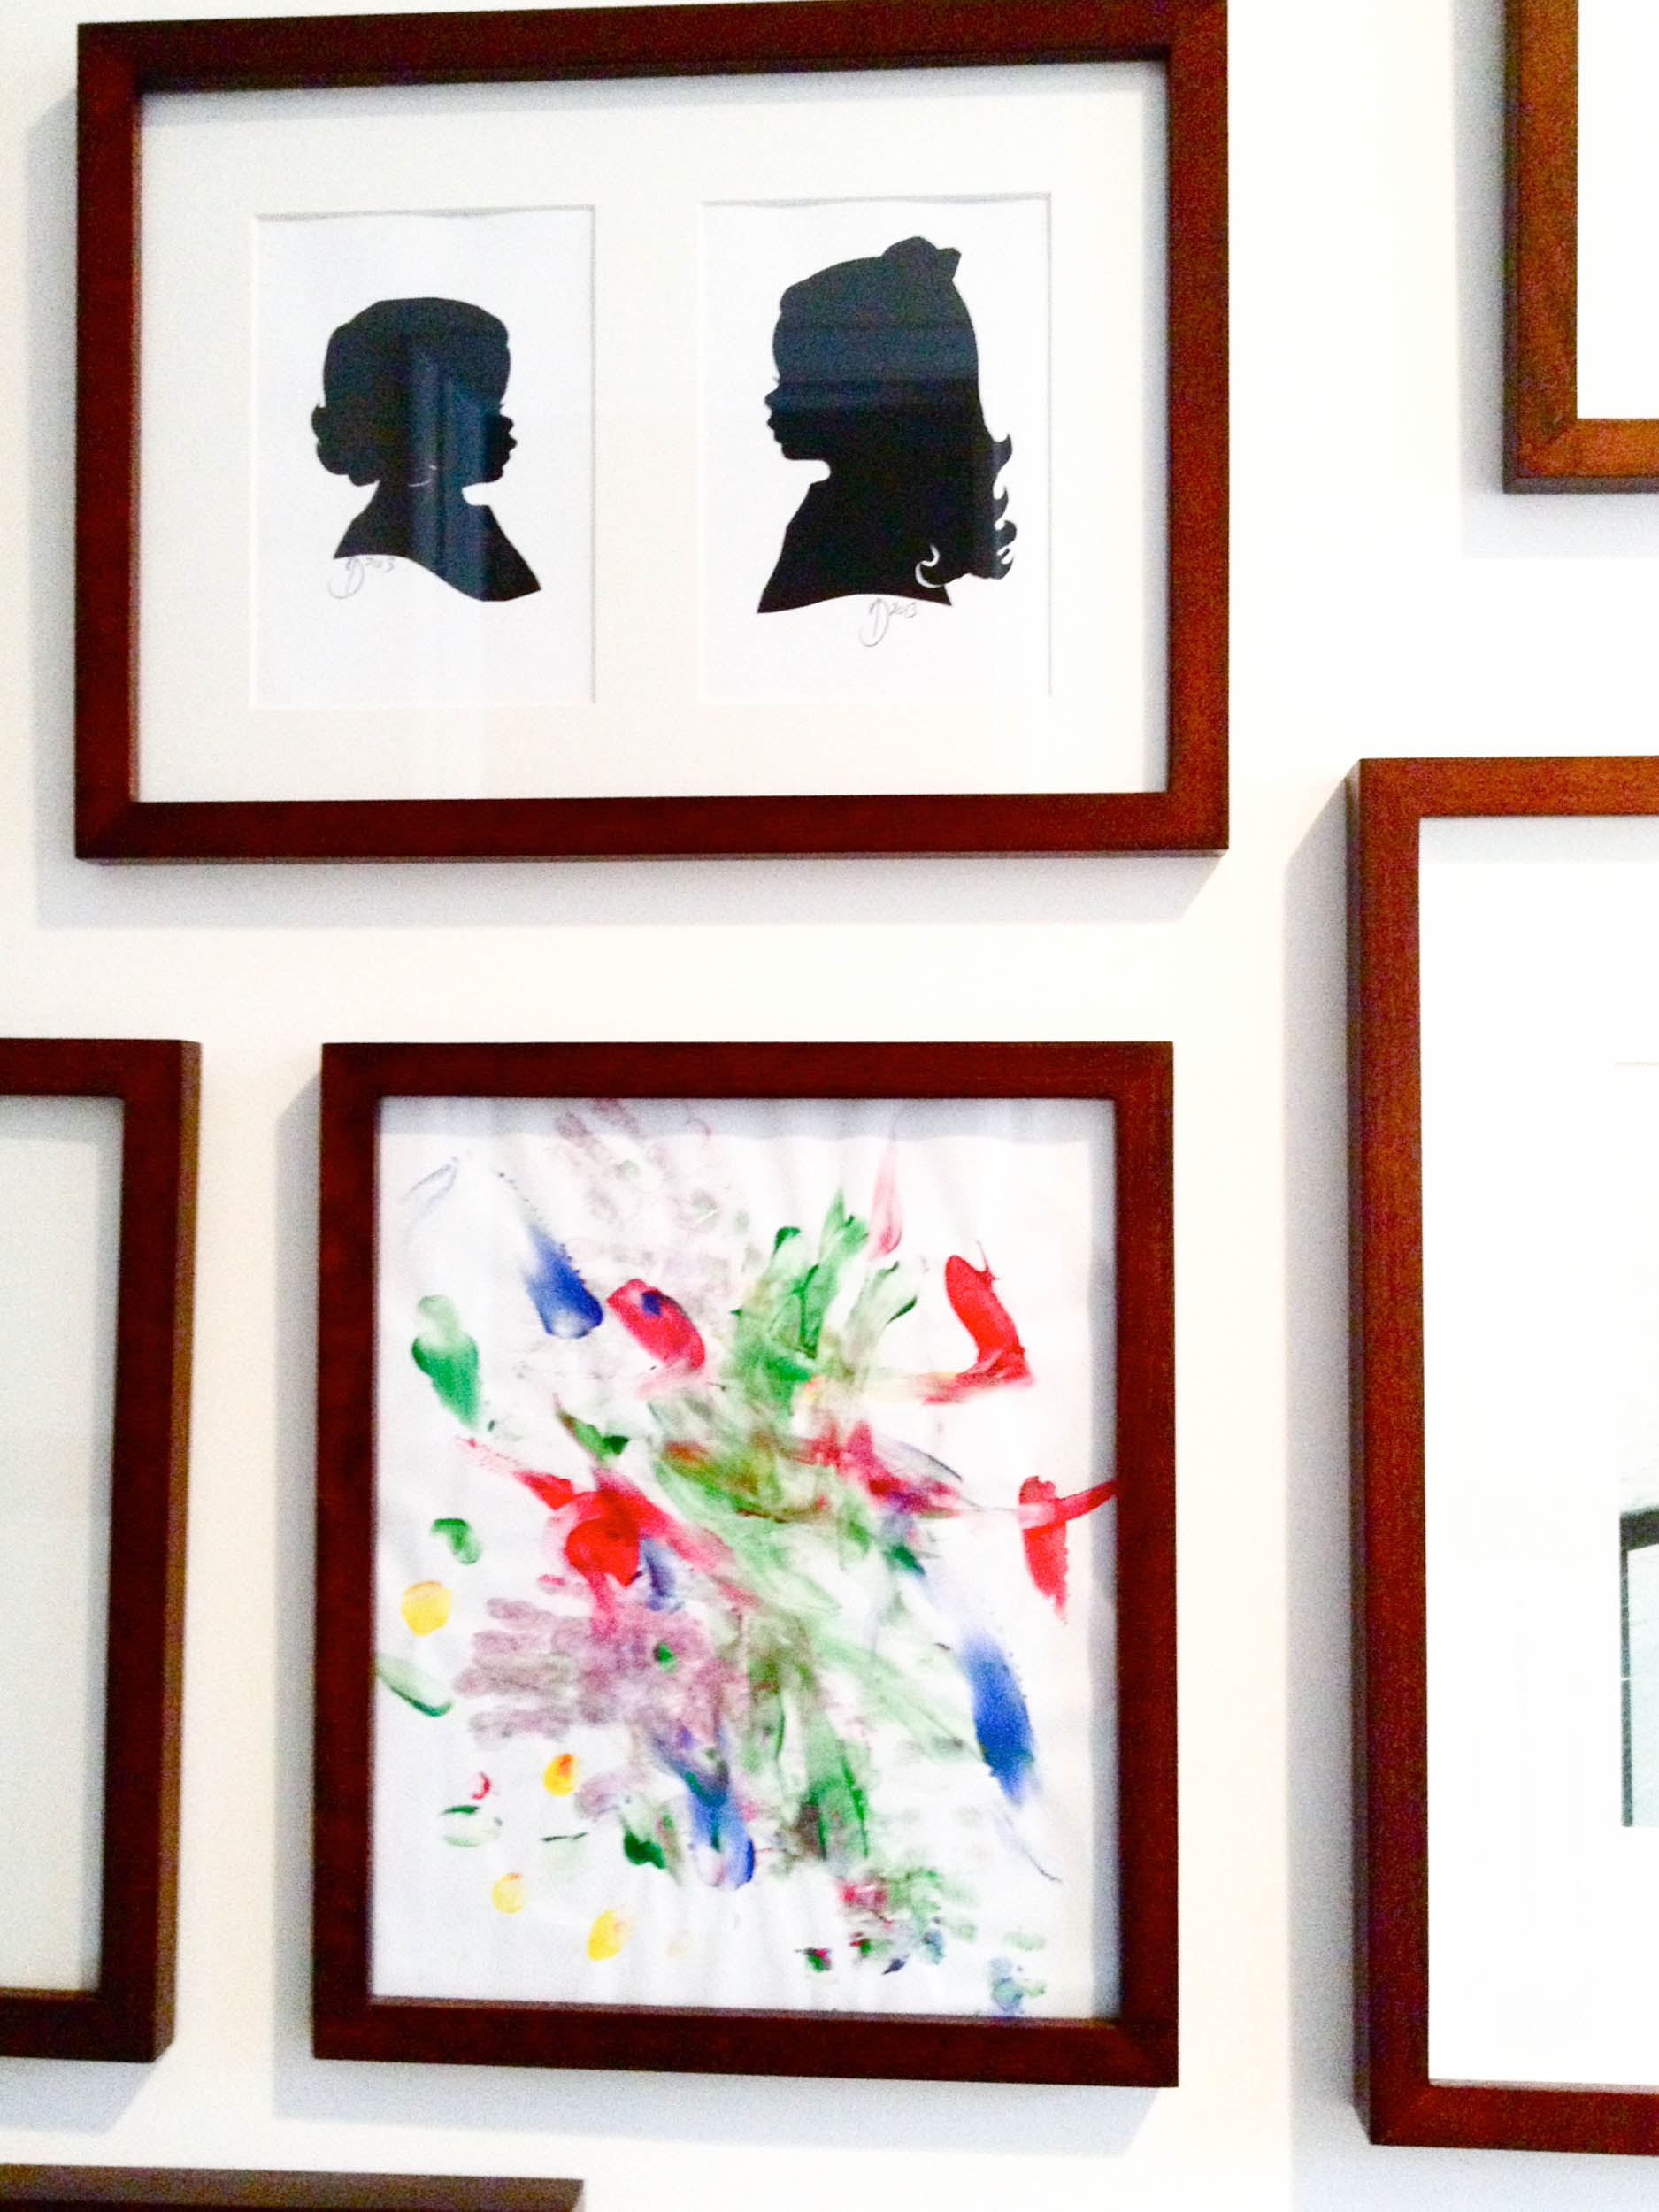
For visual interest and charm, we incorporated art in the form of Sienna’s finger painting, silhouettes of the girls done by a local artist, a custom watercolor home portrait, and special keepsakes like Jen and Flip’s wedding invitation and a special reminder penned on kraft paper. A framed Arts & Crafts pinecone marks the season the gallery wall was completed.
Gallery Wall Design Tipsheet
Ten steps to creating a meaningful gallery wall:
- Select your inspiration photo or theme – There are no hard-and-fast rules when creating your own personal gallery, but starting with an inspiration photo or theme and incorporating supporting elements creates a strong and cohesive look.
- Determine Your Wall – Asses which room and which of its walls you want to create your gallery on. Based on your photo theme, different spaces make more sense than others. Images of fruits and vegetables would look lovely in a breakfast nook but may feel odd in a den. Elegant artwork and sketches may evoke creativity in a home office or library but feel stuffy in a mudroom. And multi-generational family photos are charming in a living space or stairwell but may feel uncomfortable in your bedroom. Do you really want to see your great-grandparent’s faces from under your covers?
- Measure Your Wall – Measure the length and height of your wall to know how much space you have to work with. If the wall has furniture on it, only measure the section that is viable to create a gallery on. Make note of these measurements on a working sheet of paper.
- Collect Your Photos – Make a pile of the physical photos you’d like to use and a digital file of the images you need to have printed. Note what size your physical photos are. Keep in mind that while you may want to use the original 8’ x 10’ family heirloom that was passed down to you, you have the ability to print your digital professional family photos or snapshots in a variety of different sizes, and even color or black-and-white, to fit your design.
- Select a Frame Color – Based on your photos, gallery theme, and surrounding furnishings and style, determine whether you want to create a unified look with all of the same color frames or create an eclectic look with a mix of finishes.
- Select a Layout – Determine if you want to create a classic symmetrical grid with all the same size frames or a whimsical flow of varying sizes.
- Cut Kraft Paper Templates – There are two important frame measurements you need to be mindful of: the exterior size of the frame and what size photo it holds. Cut each template to the exterior measurement of the frame. Next, write on each template what size photo it holds (this is especially helpful if you’re using multi-opening or oversized mat frames) or loosely adhere the photo you know you want in that frame (or a sticky note that identifies it) to it.
- Lay Out Your Template Design – Based on the scale of your gallery wall, you can do a mock layout by arranging the templates on the ground or you can begin right on the wall by adhering them in place with easy-to-remove blue painter’s tape. These tools will allow you to move your design around, as you play with symmetry and spacing, until you’ve achieved the look and feel you want.
- Purchase and Fill the Frames – Whenever I’ve made my own gallery walls, I like to write the dates of the photos on the bottom backs of the images with a smooth, fine-point Sharpie or include a sticky note behind the mats detailing who’s in the photos or any special details about them. It’s nice to know that when I’m not here to tell their stories one day, the stories can be found hidden in the frames.
- Install the Frames – For each frame, using the hanging template as your guide, measure where the mounting hardware is on the back of the frame and mark those locations on the template. Now you have your points for nails or screws. Check each mount with a level. Be sure to use the proper mounting hardware for the frame weight and your wall type. When in doubt, hire a licensed contractor.
This gallery of love was a labor of love, indeed. The epic tribute spans generations, adventures, and memories that this family will cherish and enjoy every day for years to come. Are you inspired to create your own?
P.S. Over eight years later…
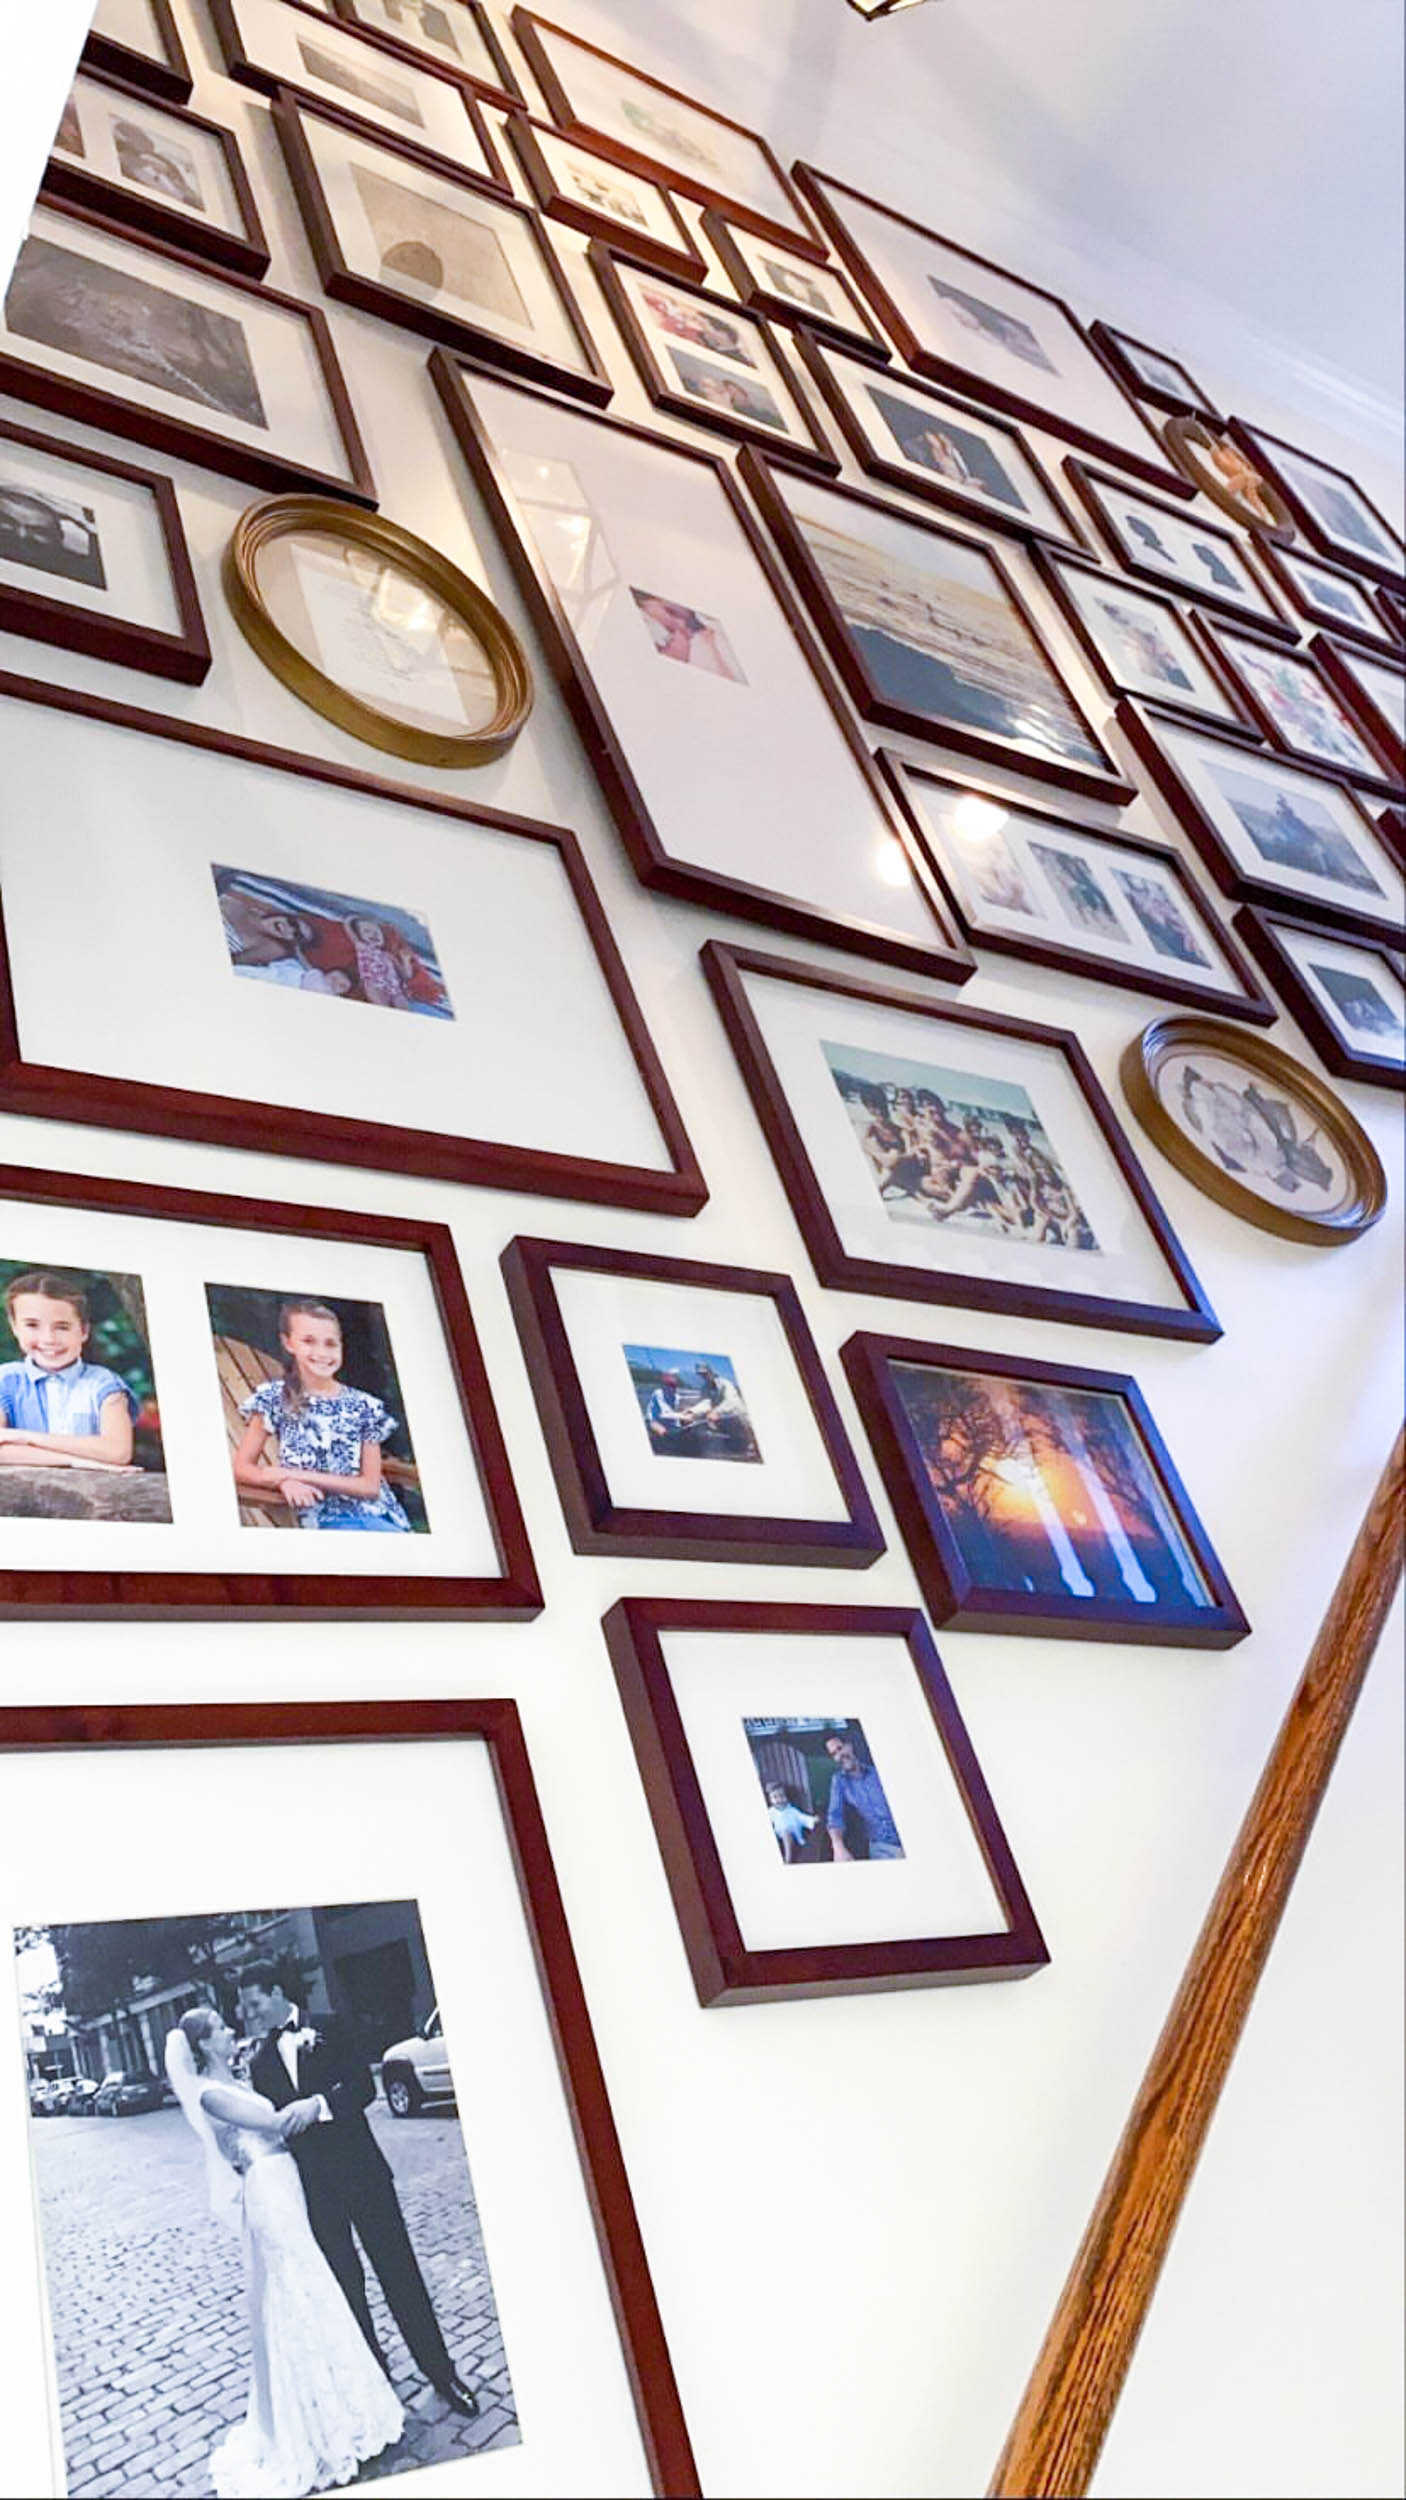
Jen and I recently connected again on Instagram and just this week, she sent me these photos of their gallery wall so I could see how incredible it still looks over eight years later. I have to admit, I got a lump in my throat and a little teary looking at the updated photos of the girls and seeing that they had been blessed with a third child, sweet Felix. This gallery was doing exactly what it was supposed to do: anchor a family to its generational memories while leaving space to celebrate growth and change. I’ve never felt so honored to have been part of something so meaningful. The photo that tugged on my heart the most is the beautiful, more recent family photo of all five of them sitting on a jetty in Bay Head, NJ. If you scroll back through the images I took in 2012, you’ll see that frame is empty in them. Jen wasn’t sure what to fill it with back then and I’d assured her, “Don’t worry, you’ll know when you know.” She must have known there was still a special soul waiting to complete their gallery of love. And now it’s full.
I’m listening to:
Resources:
Wood Frames: Pottery Barn, Wood Gallery Single Opening, Multi-Opening, and Oversized Mat Frames: Espresso
Oval Frames: eBay (Similar to shown.)
Silhouettes: (Similar to shown.)
-This Gallery of Love was created in 2012. Photos via iPhone 4.